Sun-Kissed Skin: Bronzer & Highlighter for a Natural Tan This Summer
Achieve a natural-looking, sun-kissed glow this summer by mastering the art of using bronzer and highlighter, enhancing your features without the harmful effects of the sun.
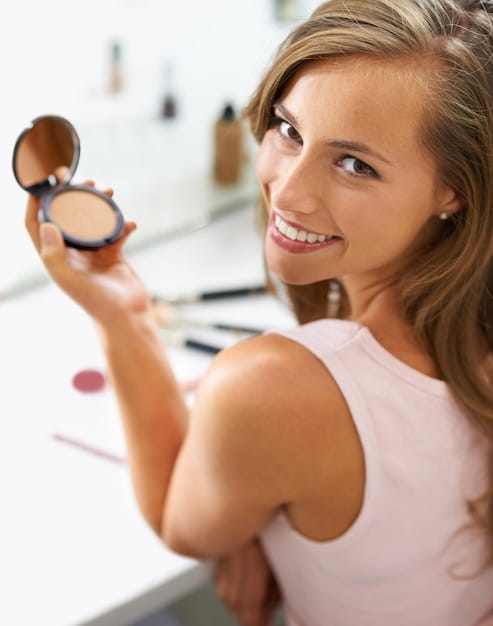
Ready to achieve that coveted sun-kissed glow without exposing your skin to harmful UV rays? This summer, the secret lies in mastering the art of sun-kissed skin: get a natural-looking tan with bronzer and highlighter this summer. Let’s dive into how you can achieve this effortlessly.
Choosing the Right Bronzer for Your Skin Tone
Selecting the perfect bronzer is crucial for achieving a natural-looking tan. It’s not about going several shades darker, but about enhancing your natural skin tone with warmth and dimension. The wrong shade can lead to an unnatural, muddy appearance.
Understanding Undertones
Understanding your skin’s undertone is the first step. Are you warm, cool, or neutral? This will guide your bronzer selection. Warm undertones look best with bronzers that have a golden or peachy hue, while cool undertones benefit from bronzers with a rose or beige base. Neutral undertones can experiment with a wider range, but should avoid anything too orange.
Powder vs. Cream Bronzers
The formulation also matters. Powder bronzers are great for oily or combination skin, as they help control shine. Cream bronzers, on the other hand, are ideal for dry or mature skin, providing a dewy, hydrated finish. Consider your skin type and the look you’re going for when making your choice.
- Fair Skin: Opt for light beige or peach-toned bronzers.
- Medium Skin: Golden or bronze shades work well.
- Deep Skin: Rich mahogany or chocolate bronzers are ideal.
- Oily Skin: Choose powder bronzers with a matte finish.
Mastering the bronzer selection process sets the foundation for a flawless sun-kissed look. By considering your skin tone and type, you can ensure a natural and radiant finish.
Highlighting: Adding Dimension and Glow
Highlighter is the key to adding dimension and a luminous glow to your sun-kissed complexion. When applied correctly, it catches the light and enhances your best features, creating a youthful and radiant appearance. Choosing the right highlighter shade and formulation is essential.
Types of Highlighters
Highlighters come in various forms, including powder, cream, and liquid. Powder highlighters are versatile and work well for most skin types, offering a subtle shimmer. Cream highlighters provide a dewy, natural glow and are great for dry skin. Liquid highlighters are highly pigmented and ideal for creating an intense, radiant effect.
Choosing the Right Shade
The right highlighter shade should complement your skin tone. Fair skin tones look best with pearl or champagne highlighters. Medium skin tones can pull off gold or rose-gold shades, while deep skin tones shine with bronze or copper highlighters. Avoid shades that are too light, as they can appear ashy.

- Powder Highlighter: Best for oily or combination skin.
- Cream Highlighter: Provides a dewy glow for dry skin.
- Liquid Highlighter: Creates an intense, radiant effect.
- Pearl Highlighter: Ideal for fair skin tones.
Highlighting is an art that enhances your natural beauty by adding dimension and radiance. By choosing the right type and shade, you can create a luminous glow that complements your sun-kissed tan.
The Bronzer and Highlighter Application Techniques
The application technique is just as important as the products you choose. Knowing where and how to apply bronzer and highlighter will ensure a natural, seamless finish that enhances your features.
Applying Bronzer
Start by applying bronzer to the areas where the sun naturally hits your face: the forehead, cheekbones, and jawline. Use a large, fluffy brush to blend the product seamlessly into your skin, avoiding harsh lines. Remember to tap off any excess product from the brush to prevent over-application. Apply in a “3” shape, from your forehead, down to your cheekbones, and then along your jawline.
Applying Highlighter
Apply highlighter to the high points of your face, where light naturally catches: the cheekbones, brow bone, bridge of the nose, and cupid’s bow. Use a small, tapered brush or your finger to apply the product. Blend the highlighter seamlessly into your skin, creating a subtle, radiant glow.
The key to a natural finish is blending. Use a clean brush to blend the edges of the bronzer and highlighter into your skin, creating a seamless transition. Avoid harsh lines or patches of color.
- Bronzer: Apply in a “3” shape for a natural tan.
- Highlighter: Focus on high points for a radiant glow.
- Blending: Crucial for a seamless, natural finish.
- Light Hand: Start with a small amount and build up gradually.
Mastering the bronzer and highlighter application techniques is essential for achieving a sun-kissed glow that looks natural and effortless. By focusing on the right areas and blending seamlessly, you can enhance your features and create a radiant complexion.
Tools of the Trade: Brushes and Sponges
Having the right tools can make all the difference in achieving a flawless bronzer and highlighter application. Investing in high-quality brushes and sponges will ensure a smooth, even finish and make the application process much easier.
Bronzer Brushes
For bronzer, a large, fluffy brush with soft bristles is ideal. This type of brush allows you to apply the product evenly and blend it seamlessly into your skin. Look for brushes that are slightly angled, which can help you contour your cheekbones with precision.
Highlighter Brushes
For highlighter, a small, tapered brush is perfect. This type of brush allows you to apply the product precisely to the high points of your face. Fan brushes can also be used for a softer, more diffused highlight.
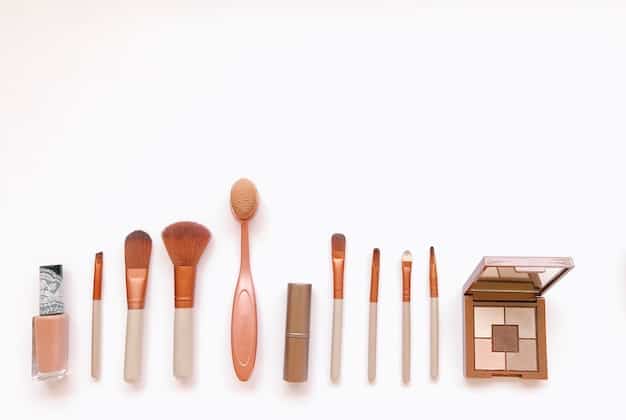
Sponges are also useful for blending cream bronzers and highlighters. A damp beauty sponge can help you achieve a seamless, airbrushed finish. Remember to clean your brushes and sponges regularly to prevent bacteria buildup and ensure optimal performance.
- Large, Fluffy Brush: Ideal for applying bronzer evenly.
- Small, Tapered Brush: Perfect for precise highlighter application.
- Fan Brush: Creates a soft, diffused highlight.
- Beauty Sponge: Blends cream products for a seamless finish.
Investing in the right tools is essential for achieving a flawless bronzer and highlighter application. By choosing high-quality brushes and sponges, you can ensure a smooth, even finish and enhance your natural beauty.
Common Mistakes to Avoid When Using Bronzer and Highlighter
While bronzer and highlighter can enhance your natural beauty, there are several common mistakes that can sabotage your look. Avoiding these pitfalls will help you achieve a sun-kissed glow that looks natural and effortless.
Over-Applying the Product
One of the most common mistakes is over-applying bronzer and highlighter. Start with a small amount of product and build up gradually, until you achieve the desired effect. It’s always easier to add more than to remove excess product.
Using the Wrong Shade
Using the wrong shade of bronzer or highlighter can also lead to an unnatural look. Choose shades that complement your skin tone and undertone. Avoid bronzers that are too orange or highlighters that are too light.
Another mistake is applying bronzer or highlighter to the wrong areas of your face. Bronzer should be applied to the areas where the sun naturally hits your face, while highlighter should be applied to the high points. Avoid applying bronzer all over your face, which can make you look muddy.
- Over-Application: Start small and build up gradually.
- Wrong Shade: Choose shades that complement your skin tone.
- Incorrect Placement: Apply to the right areas of your face.
- Unblended Product: Blend seamlessly for a natural finish.
Avoiding these common mistakes will help you achieve a sun-kissed glow that looks natural and effortless. By starting small, choosing the right shades, applying to the correct areas, and blending seamlessly, you can enhance your natural beauty and create a radiant complexion.
Maintaining Your Sun-Kissed Glow Throughout the Day
Once you’ve achieved your perfect sun-kissed look, it’s important to maintain it throughout the day. This involves touch-ups, setting your makeup, and choosing products that have staying power.
Setting Sprays
A setting spray can help lock your makeup in place and prevent it from fading or smudging. Choose a setting spray that is designed for your skin type. Oily skin types will benefit from a matte setting spray, while dry skin types will appreciate a hydrating setting spray.
Blotting Papers
Blotting papers are essential for controlling shine throughout the day. Gently press a blotting paper onto areas that tend to get oily, such as the forehead, nose, and chin. Avoid rubbing the paper, which can disrupt your makeup.
Consider carrying your bronzer and highlighter with you for touch-ups throughout the day. A small amount of product can refresh your look and maintain your sun-kissed glow.
- Setting Spray: Locks makeup in place and prevents fading.
- Blotting Papers: Controls shine without disrupting makeup.
- Touch-Ups: Carry bronzer and highlighter for midday refreshers.
- Long-Lasting Products: Choose products with staying power.
Maintaining your sun-kissed glow throughout the day is simple with the right products and techniques. By using a setting spray, blotting papers, and touch-ups, you can ensure that your radiant complexion lasts from morning to night.
| Key Element | Brief Description |
|---|---|
| ☀️ Bronzer Choice | Select a shade that complements your skin undertone for a natural tan |
| ✨ Highlighter Application | Apply on high points to enhance features and create radiant glow |
| 🖌️ Tool Selection | Use appropriate brushes for bronzer and highlighter for a smooth finish |
| ✅ Mistake Avoidance | Avoid over-application and wrong shade choices for a natural look |
Retractable FAQ Section
▼
Select a bronzer that is one to two shades darker than your natural skin tone, ensuring it complements your undertone. For fair skin, opt for light beige or peach-toned bronzers.
▼
Apply highlighter to the high points of your face, such as the cheekbones, brow bone, bridge of the nose, and cupid’s bow to catch the light and enhance your features.
▼
Use a large, fluffy brush for applying bronzer evenly and a small, tapered brush for precise highlighter application, ensuring a smooth and seamless finish。
▼
Start with a well-moisturized base, use a light hand when applying products, and blend thoroughly. Setting sprays can also help meld the products together for a natural look.
▼
Use a setting spray to lock your makeup in place, carry blotting papers to control shine, and keep your bronzer and highlighter handy for quick touch-ups as needed.
Conclusion
Achieving a sun-kissed skin: get a natural-looking tan with bronzer and highlighter this summer is easier than ever. By choosing the right products, mastering application techniques, and avoiding common mistakes, you can create a radiant, healthy glow without the harmful effects of the sun. Embrace these tips and enjoy your summer with confidence!


