Contour Like a Pro: Expert Tips for a Sculpted Face
Contouring is a makeup technique using shadows and highlights to sculpt and define facial features, enhancing your natural bone structure and creating a more defined appearance.
Ready to Contour Like a Pro: Sculpt and Define Your Face with These Expert Tips? This guide will teach you everything you need to know to achieve a perfectly sculpted look, enhancing your features and adding dimension to your face.
Understanding Contour: The Basics
Contouring is all about using makeup to create the illusion of shadows and highlights. By strategically placing darker and lighter shades, you can reshape your face, making certain areas appear more prominent or receded.
It’s important to understand your face shape before you start contouring. This will help you determine where to apply the contour and highlight for the most flattering results.
The Science Behind Contouring
Contouring is based on the principle of light and shadow. Darker shades (contour) create shadows, making areas appear smaller or further away, while lighter shades (highlight) bring areas forward, emphasizing them.
Essential Tools for Contouring
Having the right tools can make a significant difference in your contouring results. Here are some must-have items:
- Contour Brush: A slanted or angled brush for precise application.
- Highlight Brush: A fan brush or small tapered brush for applying highlighter.
- Blending Sponge: A damp sponge for seamless blending.
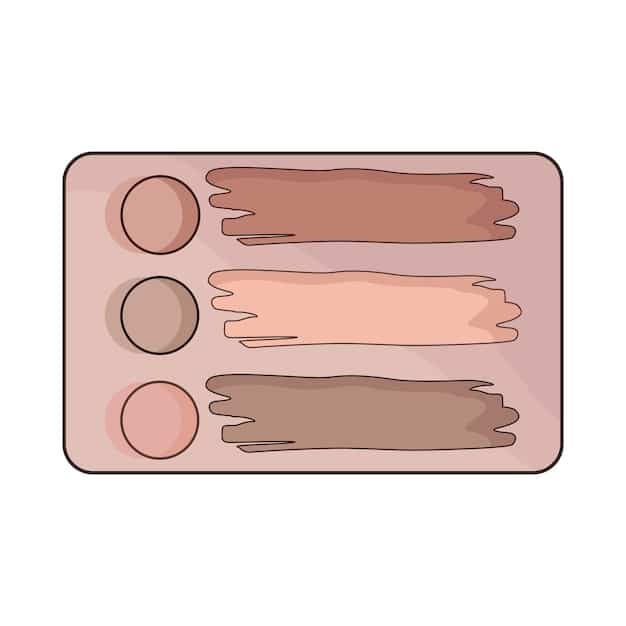
- Contour Palette: A palette with various shades of contour and highlight.
In summary, contouring involves using makeup to manipulate shadows and highlights, requiring an understanding of your face shape and the right tools for effective application.
Choosing the Right Contour Shade
Selecting the right contour shade is crucial for achieving a natural-looking sculpted effect. The ideal shade should mimic a natural shadow on your skin.
Consider your skin tone when choosing a contour shade. What works for one person may not work for another.
For Fair Skin Tones
If you have fair skin, opt for cool-toned contour shades that are one or two shades darker than your natural skin tone. Avoid warm or orange-toned contours, as they can look muddy.
For Medium Skin Tones
Medium skin tones can typically wear a wider range of contour shades. Choose a shade that is two to three shades darker than your skin tone. Neutral or slightly warm-toned contours work well.
For Deep Skin Tones
Those with deep skin tones should look for contour shades that are rich and pigmented. Deep browns or even shades with a hint of red undertones can create a beautiful sculpted effect.
Choosing the right contour shade involves considering your skin tone and selecting a color that mimics a natural shadow, avoiding shades that appear unnatural or muddy.
Step-by-Step Guide to Contouring
Now that you understand the basics and have chosen the right contour shade, let’s dive into the step-by-step process of contouring.
This guide will walk you through each step, from prepping your skin to blending your contour for a seamless finish.
Step 1: Prep Your Skin
Start with a clean, moisturized face. Apply your foundation and concealer as usual. Setting your base with a powder can help the contour blend more smoothly.
Step 2: Apply Contour
Using your contour brush, apply the contour shade to the hollows of your cheeks. To find the hollows, suck in your cheeks and apply the contour along the indentation. Also, apply contour along your temples, jawline, and the sides of your nose if desired.
Step 3: Blend, Blend, Blend
Blending is key to a natural-looking contour. Use a damp blending sponge to blend the contour seamlessly into your foundation. Use light, tapping motions to avoid moving the product around too much.
- Cheekbones: Blend upwards towards your hairline.
- Jawline: Blend downwards towards your neck.
- Nose: Blend along the sides of your nose, softening the lines.
The contouring process involves prepping your skin, strategically applying contour to the hollows of your cheeks, temples, jawline, and nose, and then blending thoroughly for a seamless finish.
Highlighting to Enhance Your Contour
Highlighting is the perfect complement to contouring. While contouring creates shadows, highlighting brings light to the high points of your face, enhancing your sculpted look.
Knowing where to apply highlighter can make a big difference in how defined your features appear.
Where to Apply Highlighter
Apply highlighter to the high points of your face, where light naturally hits. This includes:
- Cheekbones: Above the contour, on the upper part of your cheekbones.
- Brow Bone: Underneath your eyebrows to lift and define your brows.
- Bridge of the Nose: Down the center of your nose to make it appear slimmer.
- Cupid’s Bow: Above your upper lip to create the illusion of fuller lips.
- Inner Corners of the Eyes: To brighten and widen your eyes.
Types of Highlighters
There are several types of highlighters to choose from, including powder, cream, and liquid. Each type offers a different finish and level of intensity.
While powder highlighters are great for setting the makeup and creating a subtle glow, cream highlighters provide a dewy finish and liquid highlighters offer a more intense, radiant effect.
Highlighting enhances contouring by bringing light to the high points of your face, including cheekbones, brow bone, nose bridge, cupid’s bow, and inner corners of the eyes, using various types of highlighters for different finishes.
Contouring for Different Face Shapes
The technique of contouring should be adjusted based on your face shape to achieve the most flattering results. Different face shapes require different contour placement.
Understanding your face shape is crucial for customizing your contour technique.
Round Face
To contour a round face, focus on creating angles and definition. Apply contour along the sides of your face, from your temples to your jawline. This will help to slim and elongate your face.
Square Face
For a square face, soften the angles by applying contour to the corners of your forehead and along your jawline. This will help to round out your face.
Oval Face
An oval face is considered the most balanced shape, so you don’t need to do too much contouring. Simply apply contour to the hollows of your cheeks to enhance your natural bone structure.
Heart-Shaped Face
To contour a heart-shaped face, apply contour to your forehead to balance out a wider forehead with a narrower chin. You can also apply a bit of contour to the tip of your chin to soften it.
Contouring should be tailored to your specific face shape, whether round, square, oval, or heart-shaped, to achieve the most flattering and balanced appearance.
Common Contouring Mistakes to Avoid
While contouring can enhance your features, it’s easy to make mistakes that can result in an unnatural or unflattering look. Avoiding these common pitfalls can help you achieve a flawless contour.
Knowing what not to do is just as important as knowing what to do when it comes to contouring.
Using the Wrong Shade
Using a contour shade that is too dark or too warm can make your contour look muddy or unnatural. Always choose a shade that is close to your natural skin tone and has cool undertones.
Applying Too Much Product
Applying too much contour can result in harsh lines and an overly sculpted look. Start with a small amount of product and build up the intensity as needed.
Not Blending Enough
Failing to blend your contour properly can leave you with obvious lines and an uneven finish. Always blend your contour thoroughly for a seamless, natural-looking effect.
- Harsh Lines: Blend until the lines disappear.
- Uneven Finish: Ensure the product is evenly distributed.
Common contouring mistakes include using the wrong shade, applying too much product, and not blending enough, all of which can lead to an unnatural or unflattering appearance.
| Key Point | Brief Description |
|---|---|
| 🎨 Shade Selection | Choose a contour shade 1-2 shades darker than your skin tone, with cool undertones. |
| 🖌️ Application | Apply contour to the hollows of your cheeks, temples, jawline, and sides of your nose. |
| 🧽 Blending | Blend thoroughly with a damp sponge for a seamless, natural finish. |
| ✨ Highlighting | Apply highlighter to the high points of your face to enhance the sculpted effect. |
FAQ
▼
Contouring enhances your face by creating shadows and highlights, making your features look more defined and sculpted. It balances your face shape and adds depth.
▼
Yes, but use a tinted moisturizer or primer to smooth your skin. This will help the contour blend better and look more natural without a full face of makeup.
▼
A slanted or angled brush is ideal for contouring. A small, tapered brush is best for the nose. Choose synthetic bristles for creams, natural bristles for powders.
▼
Baking involves applying a thick layer of setting powder and letting it sit for 5-10 minutes to set your makeup and brighten certain areas. Yes, baking works well with contouring!
▼
No, contouring is not only for special occasions. With a light hand and proper blending, it can be a part of your everyday makeup to subtly enhance your features
Conclusion
Mastering the art of contouring can significantly enhance your natural beauty by adding dimension and definition to your face. By following these expert tips, you can achieve a professionally sculpted look that accentuates your best features and leaves you feeling confident and radiant.


")
")

