False Lashes 101: Your Beginner’s Guide to Beautiful Eyes
False Lashes 101: A Beginner’s Guide to Applying and Removing False Eyelashes provides simple, step-by-step instructions on how to choose, apply, maintain, and remove false eyelashes, ensuring a comfortable and glamorous look for any occasion, along with crucial tips for eye health and hygiene.
Ready to enhance your look with stunning lashes? This False Lashes 101: A Beginner’s Guide to Applying and Removing False Eyelashes will provide you with everything you need to know for achieving that show-stopping look.
Understanding False Eyelashes
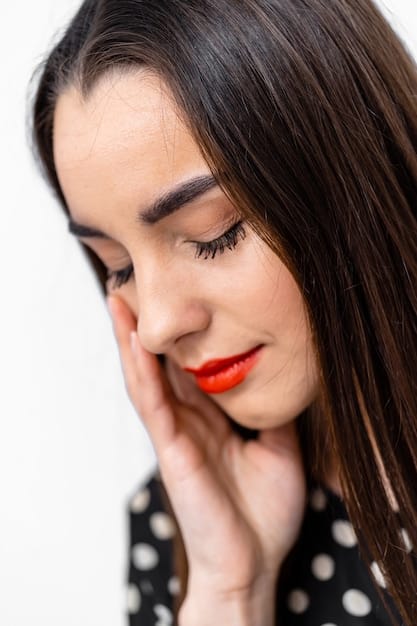
False eyelashes are a fantastic way to instantly elevate your beauty look. They come in various styles, from natural-looking enhancements to dramatic, full-volume lashes. Understanding your options is the first step to lash success.
Types of False Eyelashes
There’s a bewildering array of false eyelashes available today. Knowing the difference between them can help you find the perfect pair for your desired look.
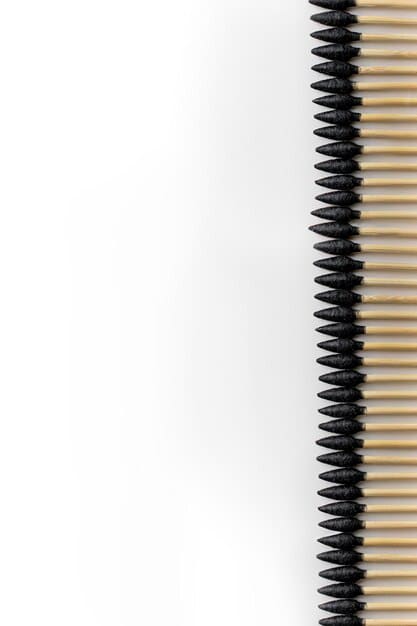
- Strip Lashes: These are the most common type, consisting of a row of lashes attached to a band. They’re relatively easy to apply and remove.
- Individual Lashes: These consist of small clusters or single lashes that are applied directly to your natural lashes. They offer a more customized and natural look.
- Magnetic Lashes: These use tiny magnets to sandwich your natural lashes between two strips. They require no glue and are reusable.
- Pre-glued Lashes: These come with adhesive already applied to the band, making application quicker and easier.
Choosing the Right Lashes for Your Eye Shape
Just like choosing the right hairstyle, selecting false eyelashes that complement your eye shape is crucial. Here are some general guidelines:
- Almond Eyes: You’re lucky! Most lash styles will suit almond eyes. Experiment with different lengths and volumes.
- Round Eyes: Opt for lashes that are longer on the outer corners to create a more elongated shape.
- Hooded Eyes: Look for lightweight lashes that won’t weigh down your lids. Avoid heavy or overly dramatic styles.
- Upturned Eyes: Balance your eye shape with lashes that are evenly distributed in length.
Choosing the right lashes can transform your look, so take your time and explore the options. Consider the occasion, your personal style, and your eye shape to find the perfect match. Remember, practice makes perfect, so don’t be afraid to experiment!
Gathering Your Supplies
Before you start applying your false eyelashes, it is essential to have all of your tools and materials prepared. Having everything within reach will make the process smoother and less stressful.
Essential Tools
Here’s a checklist of the essential tools you’ll need:
- False Lashes: Choose your desired style, ensuring they’re the right length and shape for your eyes.
- Lash Adhesive: Opt for a high-quality, latex-free adhesive to avoid irritation.
- Scissors: Small, sharp scissors are needed to trim the lashes to the correct length.
- Eyelash Applicator: This tool helps you precisely position the lashes along your lash line.
- Mirror: A magnifying mirror can be incredibly helpful for seeing the details.
Optional But Helpful Items
These items aren’t strictly necessary but can enhance your application experience:
- Eyelash Curler: Curl your natural lashes before applying falsies to help them blend seamlessly.
- Mascara: Apply a light coat of mascara to both your natural and false lashes to further blend them together.
- Cotton Swabs: These are useful for cleaning up any glue mishaps.
- Makeup Remover: Keep makeup remover handy in case you need to remove and reapply the lashes.
Having the right supplies will not only make the application process easier but also ensure a more professional-looking result. Take the time to gather everything you need before you begin.
Step-by-Step Application Guide
Now comes the fun part – applying your false eyelashes! Follow these steps carefully for a seamless and stunning result. Practice will improve your technique, so don’t get discouraged if it takes a few tries to master.
Preparing Your Lashes
Properly preparing your eyelashes is essential for a flawless application.
- Measure and Trim: Hold the lash strip against your lash line and trim any excess length from the outer corner.
- Curl Your Natural Lashes: Use an eyelash curler to curl your natural lashes, creating a base for the falsies.
- Apply Mascara (Optional): Apply a light coat of mascara to your natural lashes to help them blend with the falsies.
Applying the Adhesive
Applying the correct amount of adhesive is crucial for a secure and comfortable fit.
- Apply a Thin Layer: Squeeze a small amount of lash adhesive onto the back of your hand or a disposable surface.
- Coat the Lash Band: Using a cotton swab or the applicator tip, apply a thin, even layer of adhesive along the entire lash band.
- Wait a Few Seconds: Allow the adhesive to become tacky for about 30 seconds to a minute. This will help the lashes adhere better.
Positioning and Securing the Lashes
Carefully positioning and securing the lashes is key to achieving a natural and flattering look.
- Using an Applicator: Use an eyelash applicator to grasp the lash strip in the center.
- Position the Lashes: Look down into a mirror and gently place the lash strip as close to your natural lash line as possible.
- Secure the Corners: Use the applicator or your fingertips to press the inner and outer corners of the lash strip firmly onto your lash line.
With a steady hand and a little patience, you’ll be rocking fabulous false eyelashes in no time. Don’t be afraid to experiment and find the technique that works best for you!
Tips for a Flawless Finish
To ensure your false eyelashes look as natural and beautiful as possible, consider these additional tips.
Blending Natural and False Lashes
Achieving a seamless blend between your natural and false lashes is essential for a believable look.
- Apply Mascara: After the lashes are in place, apply a light coat of mascara to both your natural and false lashes to further blend them.
- Use an Eyeliner: Apply a thin line of eyeliner along your lash line to conceal the lash band and create a more defined look.
Addressing Common Application Issues
Even experienced lash wearers sometimes encounter application issues. Here’s how to troubleshoot some common problems.
- Lashes Lifting at the Corners: Apply more adhesive to the corners and press them firmly onto your lash line.
- Irritation or Redness: Remove the lashes immediately and discontinue use of the adhesive. Try a different, latex-free adhesive.
- Uneven Application: Gently remove the lashes and reapply, taking extra care to position them correctly.
Maintaining Your False Eyelashes
Proper maintenance can extend the lifespan of your false eyelashes and keep them looking their best.
- Clean After Each Use: Gently remove any adhesive residue with a cotton swab and makeup remover.
- Store Properly: Store your lashes in their original case or a clean container to protect them from dust and damage.
With these tips, you can achieve a flawless false eyelash application every time. Remember to practice, experiment, and find what works best for your unique eye shape and style.
Removing False Eyelashes Safely
Removing false eyelashes properly is just as crucial as applying them. Gentle removal protects your natural lashes and prevents eye irritation.
Gathering Your Removal Supplies
Having the right supplies on hand makes the removal process easier and safer.
- Makeup Remover: Choose an oil-based makeup remover or a dedicated lash adhesive remover.
- Cotton Swabs: These are ideal for applying the makeup remover and gently loosening the adhesive.
- Warm Water: Warm water can help soften the adhesive and make removal easier.
Step-by-Step Removal Process
Follow these steps for a safe and gentle removal process:
- Soak a Cotton Swab: Saturate a cotton swab with makeup remover.
- Apply to the Lash Line: Gently apply the soaked cotton swab along your lash line, focusing on the area where the adhesive is.
- Wait for a Few Minutes: Allow the makeup remover to dissolve the adhesive for a few minutes.
- Gently Peel Off the Lashes: Using your fingertips or tweezers, gently peel off the lashes from the outer corner towards the inner corner.
Aftercare for Your Natural Lashes
After removing your false eyelashes, it’s important to care for your natural lashes.
- Remove Adhesive Residue: Use a cotton swab and makeup remover to gently remove any remaining adhesive residue from your lash line.
- Apply a Lash Serum (Optional): Apply a lash serum to nourish and strengthen your natural lashes.
Properly removing your false eyelashes is essential for maintaining the health and integrity of your natural lashes. Gentle care and attention will prevent damage and irritation.
Choosing the Right Adhesive
The adhesive can make or break your false lash experience. Consider these factors when choosing the best one for you.
Types of Adhesives
There are two main types of lash adhesives:
- Latex-Based Adhesives: These are the most common type, known for their strong hold and affordability. However, they can cause allergic reactions in some individuals.
- Latex-Free Adhesives: These are a great option for individuals with latex sensitivities. They are generally more expensive but offer a safer alternative.
Ingredients to Avoid
When selecting a lash adhesive, be sure to avoid products containing harmful ingredients like formaldehyde, parabens, and sulfates. These ingredients can cause irritation and other adverse reactions.
Testing for Allergies
Before applying a new lash adhesive to your entire lash line, it’s a good idea to perform a patch test. Apply a small amount of the adhesive to a small area of skin, such as your wrist or behind your ear, and wait 24 hours to see if any irritation occurs.
Choosing the right adhesive is crucial for a comfortable and long-lasting false lash application. Consider your individual needs and sensitivities when selecting a product. Remember, investing in a high-quality adhesive is an investment in the health and beauty of your eyes.
| Key Point | Brief Description |
|---|---|
| 🧐 Choosing Lashes | Select lashes based on your eye shape and desired look. |
| ✂️ Trimming Lashes | Measure and trim the lash band for a comfortable fit. |
| ✨ Applying Adhesive | Apply a thin, even layer of adhesive and wait until tacky. |
| 💧 Safe Removal | Use makeup remover to gently dissolve adhesive before removing lashes. |
Frequently Asked Questions
▼
Consider your eye shape. Almond eyes can wear almost any style, round eyes benefit from longer outer lashes, hooded eyes need lightweight lashes, and upturned eyes look balanced with evenly distributed lashes.
▼
Opt for a high-quality, latex-free adhesive to avoid allergic reactions. Ensure it’s specifically designed for false eyelashes and has good reviews for its strong hold.
▼
Trim the lashes to fit your eye, apply a thin line of adhesive, wait until tacky, and place them as close to your natural lash line as possible. Blend with mascara.
▼
Use an oil-based makeup remover to dissolve the adhesive. Gently apply it along the lash line, wait a few minutes, and then carefully peel off the lashes. Avoid pulling.
▼
With proper care and cleaning, you can reuse false lashes multiple times. Clean them after each use by gently removing adhesive and storing them in their original case.
Conclusion
Mastering the art of false eyelash application can truly enhance your beauty routine, offering a quick and effective way to elevate your look for any occasion. Armed with the knowledge from this guide, you can confidently choose, apply, and remove false eyelashes, ensuring a flawless and glamorous finish every time.


