Contour Like a Pro: 5-Minute Flawless Face (2025 Update)
Master the art of contouring with our updated 2025 guide, revealing professional techniques for sculpting a flawless face in just 5 minutes, using the right tools and products for your skin tone.
Want to achieve a perfectly sculpted face in minutes? This guide reveals the insider secrets on how to contour like a pro: insider secrets for a flawless face in 5 minutes (updated for 2025), helping you to enhance your features and achieve a flawless finish, no matter your skill level.
Contouring 101: Understanding the Basics
Before diving into the techniques, it’s essential to grasp the fundamental principles of contouring. Contouring isn’t just about applying dark makeup; it’s about using shadows and light to reshape and define your facial features.
The Power of Light and Shadow
Contouring works by creating the illusion of shadows, which recede areas, and highlights, which bring areas forward. This contrast adds dimension and structure to your face.
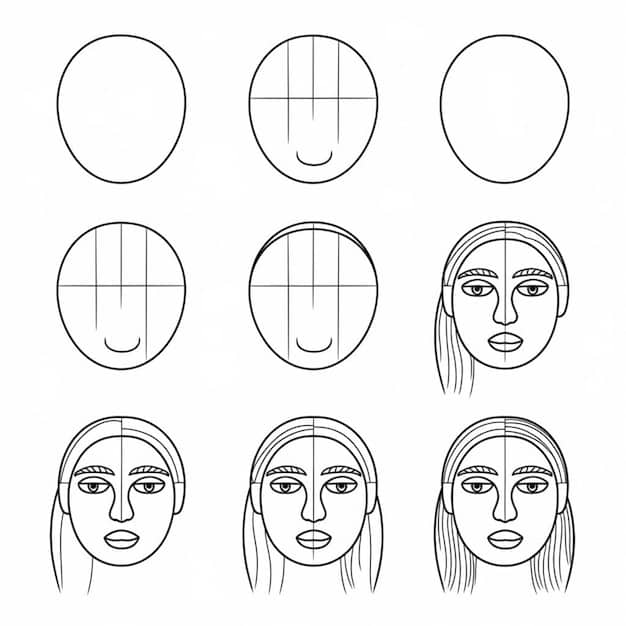
Identifying Your Face Shape
Understanding your face shape is crucial for effective contouring. Different face shapes benefit from specific contouring techniques that enhance their natural features. Common face shapes include oval, round, square, heart, and oblong.
- Oval: Considered the most balanced shape, requiring minimal contouring.
- Round: Aim to create angles and slim the face.
- Square: Soften the jawline and add dimension to the forehead.
- Heart: Balance the wider forehead with a narrower chin.
Knowing your face shape allows you to tailor your contouring to achieve the most flattering results. Experiment and adjust techniques to find what works best for you.
In essence, mastering the basics of light, shadow, and face shape recognition sets a solid foundation for professional-looking contouring. Understanding these principles empowers you to enhance your natural beauty with confidence.
Essential Tools and Products for Pro Contouring
Having the right tools and products is crucial for achieving a seamless and professional contour. Selecting the appropriate items ensures that your contour blends effortlessly and complements your skin tone.
Contour Products: Powders, Creams, and Sticks
There are various types of contour products available, each with its own set of advantages. Powders are great for beginners due to their blendability, creams offer a natural-looking finish, and sticks provide precise application.
- Powder Contour: Ideal for oily skin, easy to blend and buildable.
- Cream Contour: Best for dry skin, offering a dewy, natural finish.
- Contour Sticks: Perfect for on-the-go application and precise contouring.
Highlighting Products: Adding Dimension
Highlighting products enhance the areas you want to bring forward, complementing the shadows created by contouring. Choose between powder, cream, or liquid highlighters based on your skin type and desired effect.
Highlighters come in various forms, each offering a unique effect. Powder highlighters provide a subtle glow, cream highlighters deliver a dewy radiance, and liquid highlighters offer intense luminosity.
Brushes and Sponges: Application Perfection
The brushes and sponges you use can significantly impact the final look of your contour. Invest in quality tools to ensure smooth application and seamless blending.
- Angled Contour Brush: Perfect for precise contour application on the cheeks.
- Blending Sponge: Ideal for blending cream and liquid products seamlessly.
- Fan Brush: Great for applying highlighter with a light, natural touch.
Selecting the right tools and products is essential for achieving a professional contour. Experiment with different options to find what works best for your skin type, preferences, and desired look.
Step-by-Step Contouring in 5 Minutes (2025 Edition)
Achieving a flawless contour doesn’t have to be time-consuming. With the right techniques, you can sculpt and define your face in just 5 minutes. This step-by-step guide provides a quick and effective contouring routine.
Prep Your Skin
Start with a clean and moisturized face. Apply your base makeup, such as foundation and concealer, before contouring to create a smooth canvas.
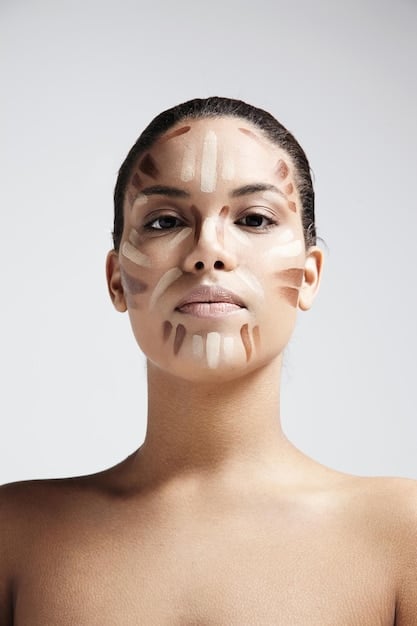
Apply Contour
Using an angled brush or contour stick, apply the contour product to the hollows of your cheeks, starting from your ear and blending towards the corner of your mouth. Also, apply contour along your hairline and jawline to add definition.
Blend, Blend, Blend
Blend the contour seamlessly into your skin using a blending sponge or brush. Ensure there are no harsh lines by blending in circular motions.
Apply Highlight
Apply highlighter to the high points of your face, such as your cheekbones, brow bone, and the bridge of your nose. This will bring these areas forward and enhance your features.
Set with Powder
Set your contour and highlight with a translucent powder to ensure they last all day. Use a light hand to avoid cakiness.

Following these simple steps allows you to achieve a professionally contoured face in just 5 minutes. This routine is perfect for busy mornings or when you need a quick beauty boost.
Contouring Techniques for Different Face Shapes
Tailoring your contouring technique to your specific face shape can significantly enhance your features and create a more balanced look. Here are some contouring tips for different face shapes.
Oval Face
Oval faces require minimal contouring. Simply apply contour along your cheekbones to add slight definition.
Round Face
To slim a round face, apply contour along the sides of your forehead, the hollows of your cheeks, and along your jawline. Blend well to avoid harsh lines.
Square Face
Soften a square face by applying contour to the corners of your forehead and along your jawline. This will create a more rounded appearance.
Heart-Shaped Face
Balance a heart-shaped face by applying contour to the sides of your forehead and under your cheekbones. This will narrow the forehead and add definition to your lower face.
Understanding your face shape and adapting your contouring technique accordingly can make a significant difference in your overall look. Experiment with these tips to find what works best for you and enhances your natural features.
Common Contouring Mistakes to Avoid
While contouring can enhance your features, making common mistakes can lead to an unnatural or unflattering look. Here are some contouring pitfalls to avoid.
Using the Wrong Shade
Choosing a contour shade that is too dark or too warm can create harsh lines and an unnatural appearance. Opt for a shade that is 2-3 shades darker than your natural skin tone and has cool undertones.
Applying Too Much Product
Applying too much contour product can result in a muddy or overdone look. Start with a small amount of product and build up the intensity as needed.
Forgetting to Blend
Failing to blend your contour properly can leave harsh lines that are unflattering. Blend your contour seamlessly into your skin using a blending sponge or brush.
Ignoring Your Face Shape
Applying contour without considering your face shape can result in an unbalanced look. Tailor your contouring technique to enhance your specific face shape.
Avoiding these common contouring mistakes will help you achieve a natural and flawless look. Pay attention to your shade choice, product application, blending technique, and face shape to ensure you’re contouring like a pro.
Advanced Contouring Techniques for 2025
As contouring techniques evolve, incorporating advanced methods can elevate your makeup game and create stunning looks. Here are some advanced contouring techniques to try in 2025.
Reverse Contouring
Reverse contouring involves applying concealer to the areas you would typically contour, such as the hollows of your cheeks and along your jawline. Then, blend the concealer outwards to create a subtle shadow.
Draping
Draping is a contouring technique that uses blush to sculpt and define the face. Apply blush to the cheekbones and blend upwards towards the temples to create a lifted and sculpted effect.
Highlighting with Skincare
For a natural and radiant highlight, mix a liquid highlighter with your favorite skincare serum or moisturizer. Apply this mixture to the high points of your face for a subtle, lit-from-within glow.
Exploring these advanced contouring techniques can help you achieve a more sophisticated and modern look. Experiment with these methods to find what works best for your skin and enhances your natural beauty.
| Key Point | Brief Description |
|---|---|
| 💡 Face Shape | Identify your face shape for tailored contouring. |
| 🖌️ Essential Tools | Use the right brushes and products for seamless blending. |
| ⏱️ 5-Minute Routine | Quick steps for a flawless contour on busy days. |
| 🚫 Mistakes | Avoid common errors for a natural contour. |
Frequently Asked Questions (FAQs)
▼
Contouring is a makeup technique that uses shadows and highlights to define and reshape facial features, creating a more sculpted and dimensional appearance by enhancing bone structure.
▼
Powder contours are generally recommended for beginners due to their blendability and ease of application. Contour sticks offer precision, while cream contours provide a natural look.
▼
Select a contour shade that is 2-3 shades darker than your natural skin tone with cool undertones to mimic natural shadows. Avoid warm, orange-toned shades for contouring.
▼
Use a blending sponge or brush to blend the contour seamlessly into your skin with circular motions. Ensure there are no harsh lines and that the contour fades naturally into your base makeup.
▼
Yes, contouring can be used on all face shapes, but the technique should be tailored to enhance the specific features and proportions of each shape for the best results.
Conclusion
Mastering the art of contouring is within your reach with these insider secrets. Whether you’re a beginner or looking to refine your technique, these tips will help you achieve a flawless face in just 5 minutes, keeping you on-trend for 2025 and beyond.
")
")


