Achieve a Natural Glow: Top 5 Bronzing Techniques for Summer 2025

Achieve a natural glow for Summer 2025 by mastering bronzing techniques like powder application, cream contouring, self-tanner prep, spray tan maintenance, and understanding undertones, ensuring a sun-kissed look without sun damage.
Ready to achieve a natural glow that lasts all Summer 2025? Ditch the harmful sunbathing and embrace smart bronzing techniques for a healthy, radiant complexion.
Top 5 Bronzing Techniques for Summer 2025
Summer is synonymous with sun-kissed skin, but achieving that coveted glow shouldn’t come at the expense of your skin’s health. Luckily, 2025 offers a plethora of bronzing techniques that allow you to achieve a radiant complexion without ever stepping foot in the sun.
Let’s explore the top five bronzing techniques that will help you achieve a natural glow this summer, ensuring you look and feel your best.
Understanding Your Skin Tone
Before diving into bronzing, it’s crucial to understand your skin tone. This will help you choose the right bronzer shade and application technique for a seamless, natural look. Identify whether you have warm, cool, or neutral undertones to guide your product selection.
- Warm Undertones: Characterized by golden or yellow hues in the skin.
- Cool Undertones: Characterized by pink or blue hues in the skin.
- Neutral Undertones: A balance of warm and cool hues.
Knowing your skin’s undertone ensures you avoid bronzers that look muddy or orange on your skin. Select a bronzer that complements your natural coloring for the most authentic result.

Powder Bronzer Application: The Classic Technique
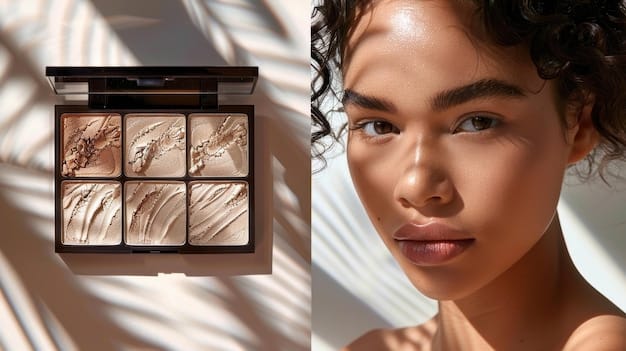
Powder bronzer is a staple in any makeup bag, and for good reason. It’s versatile, easy to apply, and perfect for creating a subtle, sun-kissed effect.
Mastering the powder bronzer is your first step towards understanding the art of achieve a natural glow. The key is to use a light hand and build up the color gradually.
Choosing the Right Brush
The type of brush you use can make or break your powder bronzer application. Opt for a large, fluffy brush with soft bristles. This will allow you to distribute the product evenly and avoid harsh lines. Angled brushes are also a great option for defining the cheekbones.
The “3” Technique
The “3” technique is a classic method for applying powder bronzer. Start at your forehead near the hairline, sweep down along your cheekbone, and then curve back in along your jawline. This creates a natural-looking contour and adds warmth to your complexion.
- Forehead: Apply bronzer along the hairline to create depth.
- Cheekbones: Sweep bronzer along the hollows of your cheeks for definition.
- Jawline: Dust bronzer along the jawline to sculpt and contour.
Blending is Key
No matter how carefully you apply your bronzer, blending is essential for a seamless finish. Use a clean blending brush to soften any harsh lines and ensure the bronzer melts into your skin. Pay extra attention to the edges of your application.
With the right brush and blending techniques, powder bronzer can easily create a flawless look. Remember to tap extra product off the brush to avoid overapplication.
Cream Bronzer Contouring: Sculpt and Define
Cream bronzer is a fantastic option for those seeking a more sculpted and defined look. It blends seamlessly into the skin and creates a natural-looking shadow. This technique is perfect for enhancing your facial features and adding dimension.
The creamy texture allows for precise application and easy blending, making it a must-try for anyone looking to achieve a natural glow with added definition.
Application Tools
When applying cream bronzer, you have a few options for tools. A dense, synthetic brush can provide precise application, while a makeup sponge can blend the product seamlessly into the skin. Choose the tool that you’re most comfortable with.
Strategic Placement
Cream bronzer is best applied to the areas where you naturally have shadows. This includes the hollows of your cheeks, along your temples, and on the sides of your nose. Be mindful not to bring the bronzer too close to your mouth, as this can create an unnatural look.
Blending for a Seamless Finish
The key to a successful cream bronzer application is thorough blending. Use your chosen tool to blend the product until it seamlessly melts into your skin. Work in small, circular motions and focus on softening the edges of the bronzer.
- Cheek Hollows: Define your cheekbones with precision.
- Temples: Add depth to the sides of your forehead.
- Sides of Nose: Slim the nose by applying bronzer along the sides.
Cream bronzer contouring is a versatile technique that allows for precise sculpting. By strategically placing and blending the product, you can enhance your facial features and achieve a natural glow.
Self-Tanner Prep: The Foundation for a Year-Round Glow
Self-tanner is a game-changer for achieve a natural glow without sun exposure. However, proper preparation is crucial for achieving a streak-free, long-lasting tan.
Exfoliation and moisturization are the cornerstones of this process, ensuring your skin is a smooth canvas for even color development.
Exfoliate
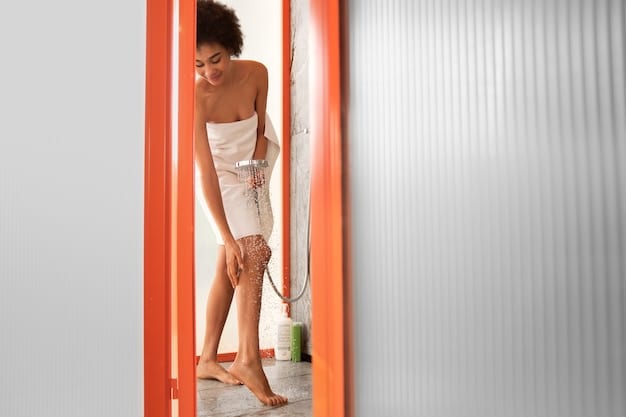
Exfoliation is essential for removing dead skin cells and creating a smooth surface for the self-tanner. Use a gentle scrub or exfoliating mitt to slough away any dry patches. Pay extra attention to areas like your knees, elbows, and ankles.
Shave or Wax
If you plan on shaving or waxing, do so at least 24 hours before applying self-tanner. This will allow your pores to close and prevent dark spots from forming.
Moisturize
Moisturize your skin well in the days leading up to your self-tanner application. Hydrated skin will absorb the self-tanner more evenly. However, avoid applying moisturizer immediately before applying the self-tanner, as this can create a barrier.
- Exfoliating Mitt: Gently removes dead skin cells.
- Shaving: Do it at least 24 hours before applying self-tanner.
- Hydration: Keeps your skin healthy and ready for the product.
Application Tips
When applying self-tanner, use a mitt to protect your hands and ensure an even application. Start at your ankles and work your way up, using long, sweeping motions. Apply sparingly to areas like your knees, elbows, and ankles, as these tend to absorb more product.
Proper preparation is key to achieving a flawless self-tan. By exfoliating, shaving or waxing, and moisturizing your skin, you can create a smooth canvas for an even, natural glow.
Spray Tan Maintenance: Extending Your Sun-Kissed Look
Spray tans are a convenient way to achieve a natural glow quickly, but maintaining that glow requires some effort. By following a few simple tips, you can extend the life of your spray tan and keep your skin looking radiant.
Proper hydration, gentle cleansing, and avoiding harsh exfoliants are key to ensuring longevity.
Moisturize Daily
Keeping your skin hydrated is crucial for maintaining your spray tan. Moisturize daily with a lotion that is free of harsh chemicals and sulfates. This will prevent your skin from drying out and flaking, which can cause your tan to fade unevenly.
Avoid Harsh Exfoliants
Avoid using harsh exfoliants or scrubs, as these can strip away your spray tan. Instead, opt for gentle cleansers and avoid scrubbing your skin too vigorously.

Pat Dry
After showering, pat your skin dry with a soft towel instead of rubbing it. Rubbing can cause friction and lead to your spray tan fading more quickly.
- Hydration: Use sulfate-free lotions to keep skin moisturized.
- Cleansers: Opt for gentle, sulfate-free cleansers.
- Pat Drying: Avoid rubbing the skin to prevent friction.
Avoid Certain Activities
Certain activities, such as swimming in chlorinated pools, can cause your spray tan to fade more quickly. If you plan on swimming, apply a waterproof sunscreen to protect your skin. Also, avoid prolonged exposure to hot tubs and saunas, as these can also strip away your tan.
By moisturizing daily, avoiding harsh exfoliants, and taking precautions in certain activities, you can extend the life of your spray tan and maintain your sun-kissed look. Keep in mind every tip and achieve a natural glow.
Understanding Your Undertones: The Key to Natural Bronzing
Understanding your skin’s undertones is paramount to achieving the most natural bronzed finish. Pairing the correct bronzer shade with your skin’s natural hues ensures a seamless, sun-kissed appearance that enhances your complexion without looking artificial.
Navigating the bronzer aisle becomes effortless once you know whether your skin leans towards warm, cool, or neutral.
Identifying Warm Undertones
Warm undertones are typically characterized by hints of yellow, peach, or gold. Individuals with warm undertones usually look best in bronzers that have similar warm hues, such as golden browns or those with a slight shimmer. These shades enhance the skin’s natural warmth, creating a healthy glow.
Identifying Cool Undertones
Cool undertones reveal themselves through subtle pink, red, or blue hints. Bronzers that complement cool undertones are often more neutral or even slightly cool-toned themselves. Avoid bronzers that are overly orange, as they can appear unnatural against cool skin. Instead, opt for shades with a hint of taupe or rosy brown to create a soft, believable tan.
- Warm: Golden brown or shimmering bronzers.
- Cool: Neutral or taupe bronzers.
- Neutral: Versatile, can use various shades.
Working with Neutral Undertones
Those with neutral undertones have the most flexible options when it comes to bronzers. Neutral skin possesses a balance of warm and cool hues, making it compatible with a wide array of bronzer shades. Just be careful to avoid extremes; bronzers that are too warm or too cool can still throw off the balance and appear less natural.
Understanding your undertones isn’t just about aesthetics; it’s about enhancing your natural beauty. By selecting bronzers that harmonize with your skin’s undertones, you’re more likely to achieve a natural glow that looks like you’ve spent a perfect day in the sun.
| Key Aspect | Brief Description |
|---|---|
| ☀️ Powder Bronzer | Classic technique; use fluffy brush. |
| 🧴 Cream Bronzer | Sculpts; blend seamlessly with a sponge. |
| ✨ Self-Tanner Prep | Exfoliate & hydrate before application. |
| ⏳ Spray Tan Care | Moisturize daily; avoid harsh products. |
FAQ
What is the best way to choose a bronzer for my skin tone?
▼
Select based on undertones: warm undertones suit golden bronzers, cool undertones suit neutral or rosy bronzers, and neutral undertones can wear a variety of shades. Testing is key to finding the perfect match.
How often should I exfoliate before applying self-tanner?
▼
Exfoliate 24-48 hours prior to applying self-tanner. This removes dead skin cells, ensuring an even application and preventing streaking. Avoid exfoliating immediately before application to prevent irritation.
Can I wear makeup over self-tanner or a spray tan?
▼
Yes, you can wear makeup over self-tanner or a spray tan. Apply a light layer of makeup to avoid clogging pores and ensure even coverage. Use a gentle hand when applying and removing makeup.
What are some common mistakes to avoid when using bronzer?
▼
Avoid applying too much product, not blending properly, using the wrong shade for your skin tone, and forgetting to apply bronzer to your neck and décolletage for a seamless, natural look.
How can I make my spray tan last longer?
▼
Moisturize daily, avoid harsh exfoliants, pat your skin dry after showering, avoid prolonged exposure to water, and use tan-extending products. These steps will help to prolong the life of your spray tan and keep your skin looking radiant.
Conclusion
Achieve a natural glow this Summer 2025 by mastering these bronzing techniques. Whether you prefer the classic powder, sculpted cream, consistent self-tan, or convenient spray tan, there’s a method suited for everybody. With the right prep, application, and maintenance, you can enjoy a sun-kissed complexion all season long without any sun damage.
Read more content


