Achieve a Natural Glow: Top 5 Bronzing Techniques for Summer 2025
Achieve a natural glow in summer 2025 with bronzing techniques including powder bronzers, cream bronzers, bronzing sticks, tanning drops, and gradual tanning lotions, each offering unique application methods and finishes for a sun-kissed look.
Get ready for summer 2025 by learning how to achieve a natural glow using the best bronzing techniques that will leave you looking sun-kissed and radiant.
The Ultimate Guide to Bronzing for Summer 2025
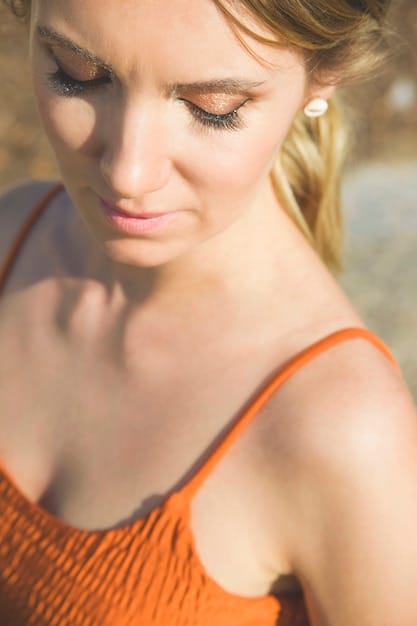
As summer 2025 approaches, achieving that coveted sun-kissed glow is a top priority for many. Bronzing is the perfect way to enhance your natural beauty without the harmful effects of sun exposure. This guide explores the top five bronzing techniques that will help you achieve a natural glow, ensuring you look radiant all season long.
Understanding Your Skin Tone
Before diving into bronzing techniques, it’s essential to understand your skin tone. Knowing whether you have fair, medium, or dark skin will help you choose the right bronzer shade. For fair skin, opt for light bronze shades with pink undertones. Medium skin tones can handle warmer bronze shades, while dark skin tones look best with rich, deep bronzes.
- Fair Skin: Light bronze shades with pink undertones.
- Medium Skin: Warmer bronze shades.
- Dark Skin: Rich, deep bronzes.
Understanding your skin’s undertones (cool, warm, or neutral) is also crucial. Cool undertones pair well with bronzers that have a rosy or mauve hue, while warm undertones complement bronzers with golden or peach hues. Neutral undertones can pull off a wide range of bronzer shades.
Choosing the Right Bronzer Formula
Bronzers come in various formulas, each offering a unique finish and application method. Powder bronzers are classic and versatile, suitable for all skin types. Cream bronzers provide a dewy, natural finish, ideal for dry or mature skin. Bronzing sticks offer precise application and are perfect for on-the-go touch-ups.
Liquid bronzers blend seamlessly into the skin for a natural-looking tan. Tanning drops can be mixed with your favorite moisturizer to create a customized, gradual tan. Each formula has its pros and cons, so choosing one that suits your skin type and preferences is important.
Powder bronzers are the most common and are great for setting makeup and adding a matte finish. Cream bronzers are hydrating and create a youthful glow. Bronzing sticks are convenient and allow for targeted application.
Technique 1: Mastering Powder Bronzers
Powder bronzers are a staple in any makeup kit, offering a matte finish and buildable coverage. Using the right brush and application technique is essential for achieving a natural, even glow. Start by selecting a powder bronzer that is one to two shades darker than your natural skin tone.
A fluffy, angled brush is ideal for applying powder bronzer. This type of brush allows for precise application and helps to blend the product seamlessly into the skin. When applying powder bronzer, remember the “3” or “E” method:
The “3” or “E” Method
This classic technique involves applying bronzer in the shape of a “3” or “E” on each side of your face. Start at your forehead, moving along your hairline towards your temples. Then, sweep the brush along your cheekbones, from your ear towards the center of your face. Finish by applying bronzer along your jawline, blending it down onto your neck. This method ensures that bronzer is applied to the areas where the sun naturally hits your face, creating a natural, sun-kissed look.
- Forehead: Apply along the hairline to add warmth.
- Cheekbones: Sweep from ear to the center of the face for definition.
- Jawline: Blend down onto the neck for a seamless finish.
Be sure to blend the bronzer well to avoid harsh lines. Use small, circular motions to buff the product into the skin, ensuring a smooth, even finish. Lightly dust bronzer across the bridge of your nose for a natural, sun-kissed effect.
Avoiding Common Mistakes
One common mistake when using powder bronzers is applying too much product. Start with a small amount of bronzer on your brush and gradually build up the color until you achieve your desired level of warmth. Avoid applying bronzer all over your face, which can make your skin look muddy.
Another mistake is using a bronzer that is too dark for your skin tone. This can create a harsh, unnatural look. If you accidentally apply too much bronzer, use a clean brush or a makeup sponge to blend it out.
Powder bronzers are an excellent option for those looking to add warmth and definition to their complexion. By using the right brush, applying the product in the correct areas, and avoiding common mistakes, you can achieve a beautiful, natural glow.
Technique 2: The Dewy Finish with Cream Bronzers
Cream bronzers are perfect for achieving a dewy, natural finish, especially on dry or mature skin. These formulas are hydrating and blend seamlessly into the skin, creating a youthful, radiant glow. Choose a cream bronzer that is slightly darker than your skin tone and has a creamy, blendable texture.
Unlike powder bronzers, cream bronzers are best applied with your fingertips, a makeup sponge, or a dense brush. The warmth of your fingers helps to melt the product into the skin, creating a seamless finish. Use a damp makeup sponge for a more diffused, natural look.
Application Techniques for Cream Bronzer
Start by applying a small amount of cream bronzer to the back of your hand. Use your fingertips or a brush to pick up the product and apply it to your forehead, cheekbones, and jawline. Blend the bronzer into the skin using gentle, circular motions, ensuring there are no harsh lines.
- Fingertips: Use warmth to melt the product into the skin.
- Makeup Sponge: Dampen for a diffused, natural look.
- Dense Brush: Provides more coverage and control.
For a natural, sun-kissed look, apply cream bronzer to the high points of your face, such as your cheekbones, temples, and the bridge of your nose. Avoid applying cream bronzer to areas where you typically get oily, such as your T-zone.
Layering for Intensity
Cream bronzers can be layered to create a more intense bronze. Start with a light layer and build up the color until you achieve your desired level of warmth. Set the cream bronzer with a light dusting of translucent powder to prevent it from creasing or fading throughout the day.
If you want to add extra dimension to your complexion, pair your cream bronzer with a cream highlighter. Apply highlighter to the high points of your face, such as your cheekbones, brow bone, and the inner corners of your eyes. This will create a luminous, sculpted look.
Cream bronzers are a fantastic option for those who want a natural, dewy glow. By understanding the right application techniques and layering strategies, you can achieve a beautiful, sun-kissed complexion that lasts all day.
Technique 3: Sculpt and Define with Bronzing Sticks
Bronzing sticks are a convenient and versatile option for achieving a sculpted, defined look. These products are typically creamy and come in a retractable stick, making them easy to apply and blend. Bronzing sticks are perfect for targeted application and are ideal for on-the-go touch-ups.
Choose a bronzing stick that is one to two shades darker than your natural skin tone. Look for a formula that is creamy and blendable, as this will make it easier to achieve a seamless finish. Avoid bronzing sticks that are too shimmery, as these can emphasize texture and pores.
Application Techniques for Bronzing Sticks
To apply bronzing stick, start by drawing a line along your cheekbones, from your ear towards the center of your face. Then, draw a line along your jawline, blending it down onto your neck. Apply bronzing stick along your temples and forehead to add warmth to your complexion.
- Cheekbones: Draw a line from ear to the center of the face.
- Jawline: Blend down onto the neck for definition.
- Temples and Forehead: Add warmth to the complexion.
Use your fingertips, a makeup sponge, or a dense brush to blend the bronzing stick into the skin. Blend in gentle, circular motions, ensuring there are no harsh lines. Focus on blending the edges of the bronzer to create a natural, seamless finish.
Highlighting with Bronzing Sticks
Bronzing sticks can also be used to highlight specific features. Apply a small amount of bronzing stick to the sides of your nose to make it appear slimmer. Apply bronzing stick to the crease of your eyes to add depth and definition. Blend well to avoid harsh lines.
Bronzing sticks are perfect for contouring because the precision allows for strategic shading that enhances your facial structure. Focus on the areas where you want to create shadows, such as under your cheekbones and along your jawline.
Bronzing sticks are a must-have for those who want a sculpted, defined look. By understanding the right application techniques and blending strategies, you can achieve a professional-looking contour that enhances your natural beauty.
Technique 4: Sun-Kissed Skin with Tanning Drops

Tanning drops are a unique and customizable way to achieve a sun-kissed glow. These concentrated formulas can be added to your favorite moisturizer or serum to create a gradual, natural-looking tan. Tanning drops are perfect for those who want control over the intensity of their tan and prefer a more subtle approach.
Choose tanning drops that are designed for the face and are formulated with hydrating ingredients. Avoid tanning drops that contain harsh chemicals or artificial fragrances, as these can irritate the skin. Start with a small amount of tanning drops and gradually increase the amount until you achieve your desired level of tan.
How to Use Tanning Drops
To use tanning drops, start by cleansing and exfoliating your skin. This will ensure an even application and prevent streaking. Mix one to three drops of tanning drops with your favorite moisturizer or serum in your palm. Apply the mixture evenly to your face and neck, avoiding the eye area.
- Cleanse and Exfoliate: Ensure even application and prevent streaking.
- Mix with Moisturizer: Customize the intensity of your tan.
- Apply Evenly: Avoid the eye area for best results.
Wash your hands thoroughly after applying tanning drops to prevent staining. The tan will develop gradually over the next few hours. You can reapply tanning drops daily until you achieve your desired level of tan.
Achieving an Even Tan
To ensure an even tan, exfoliate your skin regularly and apply tanning drops to all areas of your face and neck. Pay special attention to areas that tend to be drier, such as your forehead and chin. If you have any dry patches, apply a small amount of moisturizer to these areas before applying tanning drops.
Tanning drops are a fun and easy way to achieve a sun-kissed glow. By following these tips and using a high-quality product, you can achieve a natural-looking tan that enhances your complexion.
Tanning drops are best used at night, allowing the tan to develop while you sleep. This prevents any issues with makeup application and ensures a flawless, even glow by morning.
Technique 5: Gradual Tanning Lotions for a Natural Glow
Gradual tanning lotions are an excellent option for achieving a natural, sun-kissed glow over time. These lotions contain a small amount of DHA (dihydroxyacetone), a tanning agent that reacts with the amino acids in your skin to create a tan. Gradual tanning lotions are perfect for those who want a subtle, buildable tan without the commitment of self-tanners.
Choose a gradual tanning lotion that is designed for the face and body and is formulated with hydrating ingredients. Avoid lotions that contain harsh chemicals or artificial fragrances, as these can irritate the skin. Start by applying a small amount of lotion to clean, dry skin.
Application Tips for Gradual Tanning Lotions
To apply gradual tanning lotion, start by exfoliating your skin. This will ensure an even application and prevent streaking. Apply the lotion evenly to your face and body, using gentle, circular motions. Pay special attention to areas that tend to be drier, such as your elbows and knees.
- Exfoliate: Ensure even application and prevent streaking.
- Apply Evenly: Use gentle, circular motions.
- Moisturize Dry Areas: Prevent uneven tanning on elbows and knees.
Wash your hands thoroughly after applying gradual tanning lotion to prevent staining. The tan will develop gradually over the next few days. You can reapply the lotion daily until you achieve your desired level of tan.
Maintaining Your Tan
To maintain your tan, exfoliate your skin regularly and moisturize daily. This will help to prevent your tan from fading and keep your skin looking healthy and hydrated. Avoid using harsh soaps or cleansers, as these can strip your skin of its tan.
Gradual tanning lotions are a simple and effective way to achieve a natural-looking tan. By following these tips and using a high-quality product, you can achieve a beautiful, sun-kissed complexion that lasts.
For best results, apply gradual tanning lotion after showering when your skin is most receptive. This helps the lotion absorb better and results in a more even tan.
| Key Point | Brief Description |
|---|---|
| ☀️ Powder Bronzers | Classic, matte finish, applied with a fluffy brush. |
| 💧 Cream Bronzers | Dewy finish, hydrating, best for dry skin. |
| ✨ Bronzing Sticks | Precise application, convenient for on-the-go touch-ups. |
| 🧴 Tanning Drops | Customizable, mixed with moisturizer for a gradual tan. |
Frequently Asked Questions
▼
For fair skin, opt for light bronze shades with pink undertones to avoid an orange or muddy appearance. These shades add warmth without overwhelming your natural complexion, providing a subtle, sun-kissed glow.
▼
To prevent bronzer from looking orange, choose a shade that complements your skin’s undertones. Avoid bronzers with strong orange pigments, and blend thoroughly to ensure a seamless finish. Start with a small amount to build up the color gradually.
▼
Yes, bronzer can be used for contouring, but it’s essential to choose a matte bronzer that is slightly cooler in tone. Apply it to the hollows of your cheeks, along your jawline, and on the sides of your nose to create definition.
▼
You can apply tanning drops daily until you achieve your desired level of tan. Start with a small amount and gradually increase the amount until you achieve your desired level of tan. Monitor your skin’s reaction to avoid over-tanning.
▼
Bronzer is used to add warmth and a sun-kissed glow to the skin, while contour is used to create shadows and define facial features. Bronzer is typically warmer in tone, while contour is cooler and more matte.
Conclusion
Achieving a natural, sun-kissed glow for summer 2025 is easier than ever with these top five bronzing techniques. Whether you prefer the classic matte finish of powder bronzers, the dewy radiance of cream bronzers, the precision of bronzing sticks, the customizable nature of tanning drops, or the gradual tan from lotions, there’s a method to suit every skin type and preference. Embrace these techniques to enhance your natural beauty and step into summer with confidence and a radiant glow.


