Achieve a Natural Glow: Your Guide to At-Home Facial Masks This Year
Achieve a Natural Glow: The Ultimate Guide to At-Home Facial Masks This Year offers a comprehensive look at creating and using homemade facial masks to enhance your skin’s radiance, covering everything from ingredient selection to application techniques.
Want radiant, healthy skin without breaking the bank? Achieve a Natural Glow: The Ultimate Guide to At-Home Facial Masks This Year is your roadmap to creating effective, customized treatments using ingredients you probably already have in your kitchen.
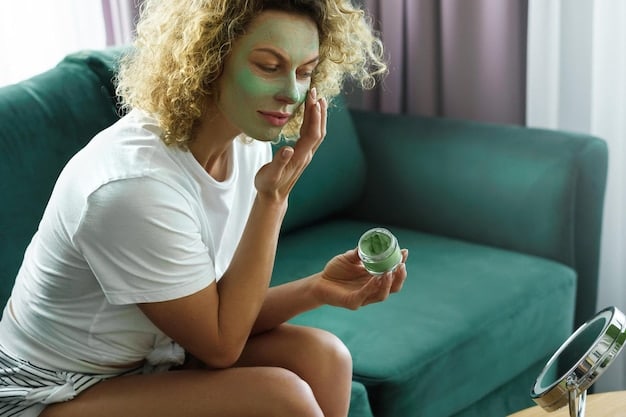
Unlock Your Radiance: The Magic of At-Home Facial Masks
Facial masks have been a staple in skincare routines for centuries, prized for their ability to deliver concentrated doses of beneficial ingredients directly to the skin. While spa treatments and high-end products offer luxurious experiences, the beauty of at-home facial masks lies in their simplicity, affordability, and customization.
This year, ditch the expensive salon visits and embrace the power of DIY skincare. Let’s explore how you can create your own facial masks tailored to your unique skin type and concerns.
Why Choose Homemade Facial Masks?
Before diving into recipes, it’s essential to understand the advantages of making your own facial masks. Here are a few compelling reasons:
- Customization: Tailor ingredients to your specific skin needs, whether it’s hydration, acne control, or brightening.
- Natural Ingredients: Avoid harsh chemicals and synthetic fragrances often found in commercial products.
- Cost-Effective: Many effective ingredients are already in your pantry, saving you money.
- Freshness: You know exactly when and how your mask was made, ensuring maximum potency.
Ultimately, the choice is yours but remember to research any ingredients and always do a patch test before applying to your whole face.
Know Your Skin Type and Its Needs
Understanding your skin type is the foundation of any effective skincare routine, especially when creating at-home facial masks. Using the wrong ingredients can lead to irritation, breakouts, or other unwanted reactions.
Let’s break down the key skin types and their common needs, so you can tailor your masks accordingly.
Identifying Your Skin Type
Not sure what your skin type is? Here’s a simple guide:
- Normal Skin: Balanced oil production, minimal sensitivity, and few imperfections.
- Dry Skin: Feels tight and rough, prone to flakiness and irritation.
- Oily Skin: Shiny appearance, enlarged pores, and prone to breakouts.
- Combination Skin: Oily in the T-zone (forehead, nose, and chin) and dry on the cheeks.
- Sensitive Skin: Easily irritated, prone to redness, itching, and allergic reactions.
Understanding these characteristics will help you choose the most suitable ingredients for your at-home facial masks.
Key Ingredients for Different Skin Types
Choosing the right ingredients is paramount to creating effective masks for particular skin types. Here are some ideas:
- For Dry Skin: Honey, avocado, yogurt, olive oil, and aloe vera provide intense hydration and nourishment.
- For Oily Skin: Clay, lemon juice, tea tree oil, and oatmeal help absorb excess oil and unclog pores.
- For Combination Skin: A blend of hydrating and oil-absorbing ingredients is ideal, such as honey and clay.
- For Sensitive Skin: Gentle and soothing ingredients like chamomile, aloe vera, and colloidal oatmeal minimize irritation.
- For Normal Skin: A variety of ingredients can be used to maintain balance and radiance, such as honey, yogurt, and fruit purees.
Tailoring your ingredients to your skin type ensures that your at-home facial masks deliver the best possible results.
Essential Ingredients for a Radiant Glow
Now that you know your skin type and its specific needs, let’s explore some powerhouse ingredients that can help you achieve a natural glow. Many of these can be combined, but it always best to test new concoctions before applying thoroughly.
These ingredients are not only effective but also readily available in most kitchens, making DIY skincare a breeze.
Honey: Nature’s Humectant
Honey is a true skincare superstar, thanks to its humectant properties, meaning it attracts and retains moisture in the skin. It’s also rich in antioxidants and has antibacterial properties, making it excellent for fighting acne and promoting a clear complexion.
Use raw, unfiltered honey for maximum benefits. Apply it directly to the skin for a simple hydrating mask or combine it with other ingredients like yogurt or oatmeal for added benefits.
Avocado: The Hydration Hero
Avocado is a nutritional powerhouse, both inside and out. Rich in healthy fats, vitamins, and antioxidants, avocado deeply nourishes and hydrates the skin, leaving it soft, supple, and glowing. Its creamy texture makes it the perfect base for a luxurious facial mask.
Mash avocado and apply it directly to the skin for a moisturizing treat. You can also combine it with honey or olive oil for an extra boost of hydration.
Yogurt: The Exfoliating Elixir
Yogurt contains lactic acid, a gentle alpha-hydroxy acid (AHA) that exfoliates dead skin cells, revealing a brighter, more even complexion. It also has probiotic benefits, which help to balance the skin’s microbiome and reduce inflammation.
Use plain, unsweetened yogurt for your facial masks. Apply it directly to the skin or combine it with honey or lemon juice for added benefits.
By incorporating these essential ingredients into your at-home facial masks, you can unlock a radiant, healthy glow without harsh chemicals or expensive treatments.
DIY Mask Recipes for Every Skin Type
Now that you know the key ingredients and their benefits, let’s dive into some specific DIY facial mask recipes tailored to different skin types. Remember to always do a patch test before applying a new mask to your entire face.
These recipes are simple, effective, and use ingredients you likely already have on hand.
Hydrating Honey and Avocado Mask (for Dry Skin)
This mask is perfect for quenching dry, parched skin and restoring a healthy glow. The combination of honey and avocado provides intense hydration and nourishment, leaving your skin feeling soft and supple.
- 1/2 ripe avocado, mashed
- 1 tablespoon raw honey
- 1 teaspoon olive oil (optional)
Mix all ingredients well and apply to clean, dry skin. Leave on for 15-20 minutes and rinse with warm water.
Oil-Absorbing Clay and Lemon Mask (for Oily Skin)
This mask helps to absorb excess oil, unclog pores, and reduce shine, leaving your skin feeling clean and refreshed. Clay draws out impurities, while lemon juice helps to brighten the complexion and control breakouts.
- 1 tablespoon bentonite clay
- 1 teaspoon lemon juice (freshly squeezed)
- 1-2 teaspoons water (to form a paste)
Mix all ingredients well and apply to clean, dry skin, avoiding the eye area. Leave on for 10-15 minutes, or until the clay is dry. Rinse with warm water.

Soothing Oatmeal and Aloe Vera Mask (for Sensitive Skin)
This mask is gentle and soothing, perfect for calming irritated skin and reducing redness. Oatmeal is a natural anti-inflammatory, while aloe vera provides hydration and promotes healing.
- 1 tablespoon colloidal oatmeal
- 2 tablespoons aloe vera gel
- 1 teaspoon honey (optional)
Mix all ingredients well and apply to clean, dry skin. Leave on for 15-20 minutes and rinse with cool water.
These DIY mask recipes can be easily adapted to your specific needs and preferences. Feel free to experiment with different ingredients and find what works best for your skin.
Application Tips for Maximum Results
Now that you have your DIY mask recipes ready, let’s discuss some application tips to ensure you get the most out of your at-home facial treatments.
Proper preparation and technique can make a big difference in the effectiveness of your masks.
Preparing Your Skin
Before applying any mask, it’s essential to properly prepare your skin. Start by cleansing your face with a gentle cleanser to remove any dirt, oil, or makeup.
- Gently exfoliate with a mild scrub or a washcloth to remove dead skin cells and allow the mask to penetrate more effectively.
- Pat your skin dry with a soft towel.
- Consider steaming your face for a few minutes to open up your pores and allow for deeper cleansing.
This pretreatment enables the best results from any mask you apply.
Application Techniques
Applying your mask correctly is just as important as choosing the right recipe. Use clean fingertips or a soft brush to apply the mask evenly to your face, avoiding the eye area.
- Apply a thin, even layer of the mask.
- Relax and allow it to sit for the recommended time, usually 10-20 minutes.
- Avoid talking or making excessive facial movements while the mask is on.
- Rinse thoroughly with warm water, using gentle circular motions to remove any residue.
Always proceed with care when dealing with the delicate eye area.
Post-Mask Care
After rinsing off your mask, pat your skin dry and follow up with your regular skincare routine. Apply a hydrating toner to balance your skin’s pH, followed by a serum and moisturizer to lock in hydration.
- Apply a broad-spectrum sunscreen during the day to protect your skin from UV damage.
- Avoid using harsh exfoliants or active ingredients immediately after using a mask to prevent irritation.
Treat your skin gently and consistently to maintain a healthy, radiant glow.
Troubleshooting Common Masking Mistakes
Even with the best recipes and application techniques, sometimes things don’t go as planned. Let’s address some common masking mistakes and how to avoid them.
Knowing what to watch out for can help you achieve better results and prevent unwanted reactions.
Overdoing It
Using facial masks too frequently can strip your skin of its natural oils and lead to irritation. Aim to use masks 1-2 times per week, depending on your skin type and the specific mask you’re using.
Avoid using multiple masks on the same day, as this can overload your skin with active ingredients.
Using the Wrong Ingredients
Using ingredients that are not suitable for your skin type can lead to breakouts, redness, or dryness. Always research ingredients and do a patch test before applying a new mask to your entire face.
Be cautious with acidic ingredients like lemon juice, which can be irritating for sensitive skin.
Leaving the Mask on Too Long
Leaving a mask on for longer than recommended can dry out your skin or cause irritation. Always follow the instructions and rinse the mask off when it’s time, even if it feels tempting to leave it on longer for extra benefits.
Set a timer to remind you when the mask needs to be removed.
Skipping the Patch Test
A skin patch test is an effective way of checking whether a certain substance causes an allergic reaction on your skin. It involves applying a small amount to a specific area of your skin and monitoring for any reactions. If you’re mixing a brand new concoction then this is highly recommended.
By avoiding these common masking mistakes, you can ensure that your at-home facial treatments are safe, effective, and enjoyable.
| Key Point | Brief Description |
|---|---|
| ✨ Ingredients | Choose based on your skin type: honey, avocado for dry skin; clay, lemon for oily skin. |
| ⏰ Application | Cleanse, exfoliate, apply mask avoiding eyes, and rinse after recommended time |
| 🗓️ Frequency | Use masks 1-2 times a week to avoid over-drying the skin. |
| 🧪 Testing | Always perform a patch test before applying new masks to your face. |
Frequently Asked Questions
▼
Frequency depends on your skin type. Generally, 1-2 times a week is sufficient to avoid over-drying or irritating the skin. Adjust as needed based on how your skin feels.
▼
Lemon juice can be too harsh for sensitive skin due to its acidity. If you choose to use it, dilute it heavily and watch for any signs of irritation. Always do a patch test first.
▼
Always cleanse your face before applying a mask to remove any dirt, oil, or makeup. This allows the mask’s ingredients to penetrate more effectively and deliver better results.
▼
It’s generally not recommended to leave a homemade mask on overnight, as it can dry out your skin or cause irritation. Stick to the recommended time frame to avoid any adverse reactions.
▼
Store leftover mask ingredients in airtight containers in the refrigerator to maintain freshness and prevent contamination. Use them within a few days for best results. Discard if there are any signs of spoilage.
Conclusion
Embracing at-home facial masks is a fantastic way to nurture your skin with natural ingredients, customize treatments to your specific needs, and achieve a natural glow within the comfort of your home. By understanding your skin type, selecting the right ingredients, and following these essential tips, you’re well on your way to getting radiant, healthy-looking skin.


