Contour Like a Pro: Secrets for a Flawless Finish in 2025
Contouring is a makeup technique that uses highlights and shadows to enhance facial features. Mastering it involves understanding face shape, choosing the right products, and blending seamlessly for a natural, sculpted look that will remain a key beauty trend in 2025.
Want to contour like a pro: insider secrets for a flawless finish in 2025? Contouring can seem intimidating, but with the right techniques and tools, anyone can achieve a sculpted, radiant look. This guide will break down the process, making it easy to enhance your natural beauty.
Understanding the Basics of Contouring
Contouring is more than just a makeup trend; it’s a technique used to sculpt and define the face. By strategically applying makeup that is darker or lighter than your skin tone, you can create the illusion of shadows and highlights, enhancing your best features.
The Science Behind Shadows and Highlights
The core of contouring lies in understanding how light interacts with the face. Darker shades mimic shadows, making areas recede, while lighter shades bring areas forward. By mastering this concept, you can reshape your face without surgery.
Identifying Your Face Shape
The first step to effective contouring is identifying your face shape. Common shapes include oval, round, square, heart, and oblong. Each shape benefits from specific contouring techniques that emphasize its natural strengths.
- Oval: Contour along the hairline, under the cheekbones, and on the jawline to maintain balance.
- Round: Focus on the sides of the forehead and under the cheekbones, extending to the jawline to create angles.
- Square: Soften the jawline and temples with contour to round out the face.
- Heart: Contour the forehead and chin to balance the wider upper portion of the face.
Understanding these basic principles is essential before diving into the practical application of contouring. Each face shape has unique features that can be enhanced using specific techniques, resulting in a more sculpted and defined appearance.
Choosing the Right Products for Contouring
Selecting the right contouring products is crucial for achieving a natural, seamless finish. The market offers a variety of options, each with its own set of benefits and ideal applications.
Powder vs. Cream Contours
Powder contours are best for those with oily skin, as they tend to be more matte and help absorb excess oil. Cream contours, on the other hand, are ideal for dry or mature skin, providing a dewy, hydrated finish.
Shade Selection: Finding Your Perfect Match
Choosing the right shade is vital. Select a contour shade that is two to three shades darker than your natural skin tone. For fair skin, opt for cool-toned taupe shades to mimic natural shadows. Medium to deep skin tones can use warmer, more bronzy shades.
- Fair Skin: Cool-toned taupe powders or creams.
- Medium Skin: Neutral to warm bronzes.
- Deep Skin: Rich, deep browns with red or golden undertones.
The choice between powder and cream contours depends largely on your skin type and personal preference. It’s essential to find a shade that complements your skin tone, ensuring a natural and well-blended result.
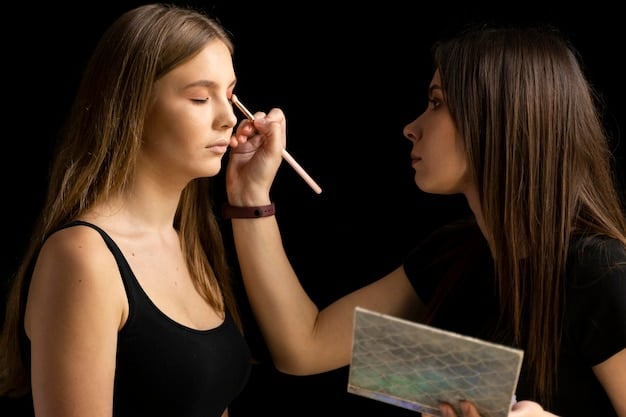
Essential Tools and Brushes for Contouring
Having the right tools can make a significant difference in the ease and effectiveness of your contouring routine. Different brushes and sponges serve specific purposes, helping you achieve a precise and well-blended application.
Brush Types and Their Uses
Angled contour brushes are perfect for applying product precisely along the cheekbones and jawline. Fluffy blending brushes help soften harsh lines, creating a seamless transition between contour and skin.
Sponge Application Techniques
Makeup sponges, especially those with a pointed edge, are excellent for applying cream contours. Use a dabbing motion to press the product into the skin rather than dragging it, which can create streaks.
- Angled Brush: Precise application on cheekbones and jawline.
- Fluffy Brush: Blending and softening harsh lines.
- Makeup Sponge: Seamless application of cream contours.
Investing in quality brushes and sponges can elevate your contouring game, providing the precision and blending capabilities needed for a flawless finish. Each tool plays a specific role in achieving a sculpted, natural look.
Step-by-Step Guide to Contouring Like a Pro
Now that you understand the basics and have the right products and tools, let’s walk through a step-by-step guide to contouring like a professional. These techniques will help you enhance your features and achieve a sculpted appearance.
Preparing Your Skin
Start with a clean, moisturized face. Apply your regular foundation and concealer before contouring to create a smooth canvas.
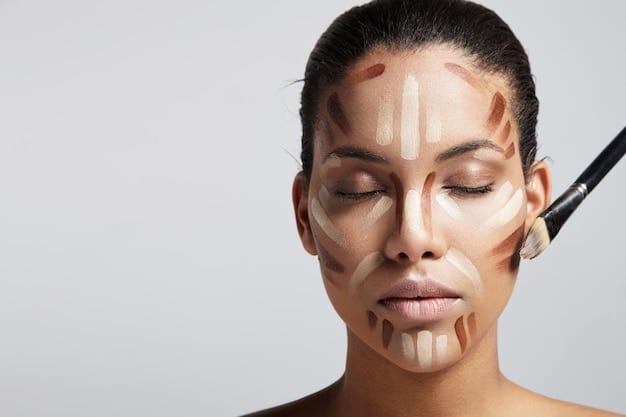
Applying Contour to Key Areas
Using an angled brush, apply your chosen contour product to the hollows of your cheeks. Find this area by sucking in your cheeks to locate the natural indentations. Also, apply contour along your temples and jawline to define these areas.
- Cheekbones: Apply contour in the hollows to create definition.
- Temples: Contour along the hairline to add dimension.
- Jawline: Define the jawline for a sculpted look.
By following these steps, you can strategically place contour to enhance your facial structure, creating a more defined and sculpted appearance.
Blending Techniques for a Natural Finish
Blending is the key to achieving a natural, seamless contour. Harsh, unblended lines can make your makeup look unnatural and heavy. Mastering blending techniques will ensure a flawless finish.
Using a Damp Sponge for Seamless Blending
A damp makeup sponge is excellent for blending cream contours. The dampness helps sheer out the product, preventing it from looking cakey.
Circular Motions vs. Tapping Motions
Use small, circular motions to blend powder contours and tapping motions for creams. This helps to seamlessly integrate the product into your skin without removing it.
- Circular Motions: Best for blending powder contours.
- Tapping Motions: Ideal for blending cream contours.
Proper blending ensures that your contour looks natural and seamless, not harsh or artificial. These techniques will help you achieve a professional, polished finish.
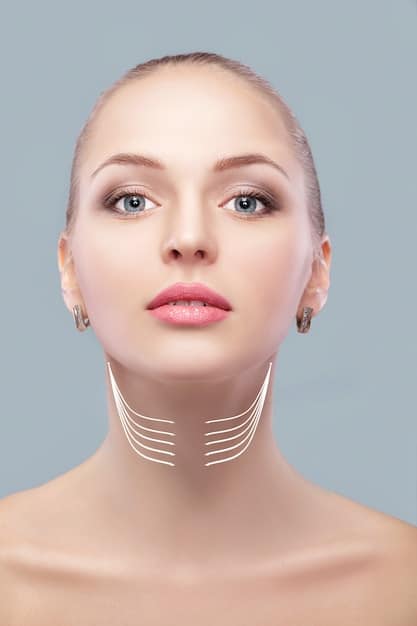
Highlighting to Complement Your Contour
Highlighting is the perfect complement to contouring, enhancing the sculpted look by bringing light to the high points of the face. Strategic highlighting can create dimension and radiance.
Choosing the Right Highlighter Shade
Select a highlighter that is one to two shades lighter than your skin tone. Champagne or pearl shades work well for fair to medium skin, while gold or bronze shades complement deeper skin tones.
Placement of Highlighter for Maximum Impact
Apply highlighter to the high points of your face, such as the tops of your cheekbones, down the bridge of your nose, on your cupid’s bow, and under your brow bone. These areas naturally catch the light, enhancing your features.
- Cheekbones: Enhances the sculpted look.
- Bridge of Nose: Creates a slimming effect.
- Cupid’s Bow: Defines the lips.
Highlighting complements contouring by enhancing the sculpted look and adding a touch of radiance. Strategic placement ensures a luminous and balanced finish.
| Key Point | Brief Description |
|---|---|
| 🎨 Face Shape | Identify your face shape for optimal contouring. |
| 🧴 Product Choice | Choose between powder and cream based on skin type. |
| 🧽 Blending | Blend seamlessly for a natural finish. |
| ✨ Highlighting | Apply highlight to enhance your contour. |
FAQ
▼
Contouring is used to enhance facial features by creating shadows and highlights. It can define cheekbones, slim the nose, and sculpt the jawline for a more defined appearance.
▼
Select a shade that is two to three shades darker than your natural skin tone. Cool-toned shades are best for fair skin, while warmer shades work well for medium to deep skin tones.
▼
While bronzer can add warmth, it’s not ideal for contouring. Contouring requires matte shades to mimic shadows, while bronzers often have shimmer and are used to add overall warmth to the face.
▼
An angled contour brush is best for precise application along the cheekbones and jawline. A fluffy blending brush is great for softening harsh lines and creating a seamless finish.
▼
Clean your contour brushes at least once a week to prevent bacteria buildup and ensure smooth application. This also helps extend the life of your brushes and maintain their performance.
Conclusion
Mastering the art of contouring can significantly enhance your makeup routine, allowing you to sculpt and define your features with professional precision. By understanding your face shape, selecting the right products and tools, and practicing effective blending techniques, you can achieve a flawless, sculpted look that will keep you on trend in 2025 and beyond.
")
")

")

