Get the Perfect Cat Eye: A Step-by-Step Guide for Beginners
Master the classic cat eye look with our step-by-step guide, designed specifically for beginners, covering essential tools, techniques, and troubleshooting tips to achieve a flawless winged eyeliner every time.
Want to achieve that iconic cat eye look but don’t know where to start? This Get the Perfect Cat Eye: A Step-by-Step Guide for Beginners will guide you through everything, making the process simple and fun. From choosing the right products and tools to mastering the application techniques, you’ll be rocking a perfect winged liner in no time.
Understanding the Basics of Cat Eye Eyeliner
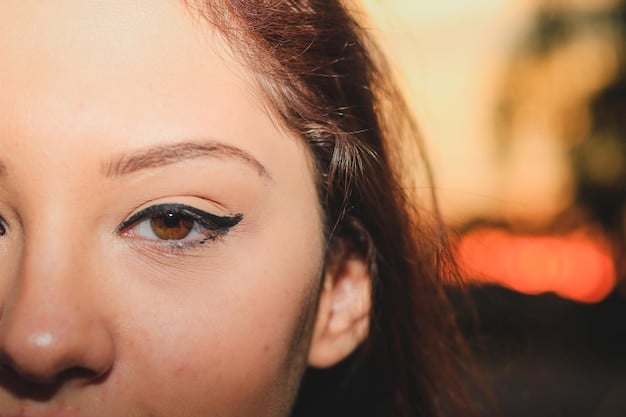
The cat eye, also known as winged eyeliner, is a makeup technique that extends your eyeliner beyond the outer corner of your eye, creating a flick or wing. It gives your eyes a lifted and defined appearance, making it a timeless and versatile look suitable for any occasion. Before diving into application, let’s cover the basics.
What Makes a Good Cat Eye?
A well-executed cat eye is characterized by a smooth, even line that gradually thickens towards the outer corner of the eye. The wing should be symmetrical on both eyes and complement your eye shape. Key elements include:
- Precision: Clean, crisp lines are essential for a polished look.
- Symmetry: Both wings should be even in length and angle.
- Appropriate Thickness: Adjust the thickness of the line to suit your eye size and shape.
Different Types of Cat Eye Styles
Cat eyes aren’t one-size-fits-all. Here are a few styles to consider:
- Classic Wing: The standard cat eye with a simple flick.
- Dramatic Wing: A thicker, bolder line with a longer, more angled wing.
- Subtle Wing: A thin, understated line with a small, subtle flick.
To summarize, understanding the basics of what constitutes a good cat eye and exploring different styles sets the foundation for achieving a personalized and flattering look. With practice and the right techniques, anyone can master this iconic makeup style.
Gathering Your Essential Tools and Products
Before you begin your cat eye journey, it’s crucial to have the right tools and products at your disposal. Having quality items can make the application process smoother and the final result more impressive. Here’s what you’ll need.
Types of Eyeliners
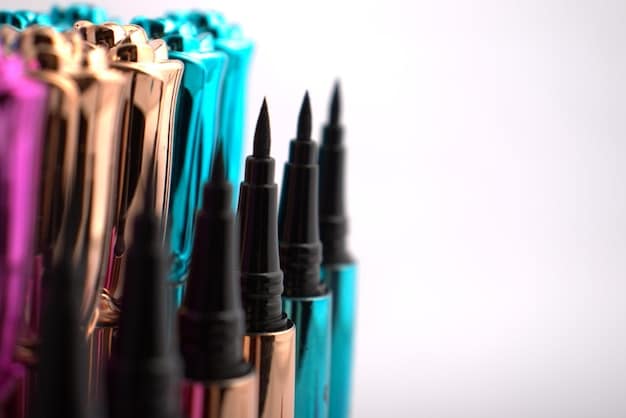
Choosing the right eyeliner is the first step. Here are some popular options:
- Liquid Eyeliner: Known for its precision and long-lasting finish, liquid eyeliner is a favorite for creating sharp, defined wings.
- Gel Eyeliner: Gel eyeliner offers a creamy texture and rich pigmentation. It is typically applied with an angled brush.
- Pencil Eyeliner: Pencil eyeliner is the most forgiving and beginner-friendly option.
Essential Tools for Application
Having the right tools can greatly improve your cat eye application:
- Angled Eyeliner Brush: This brush is essential for applying gel eyeliner.
- Makeup Remover Wipes or Cotton Swabs: Mistakes happen! Having these on hand allows you to quickly clean up any errors.
- Mirror: A good quality mirror is a must-have for seeing every detail.
In essence, gathering the right tools and products is essential for setting yourself up for success. Experimenting with different eyeliner types and having the right applicators ensures you can achieve the perfect cat eye with ease. Remember, practice makes perfect!
Step-by-Step: Applying the Perfect Cat Eye
Now that you have your tools and products ready, let’s dive into the step-by-step process of applying the perfect cat eye. Follow these steps carefully, and with a bit of practice, you’ll be rocking a flawless winged liner in no time.
Step 1: Prep Your Eyelids
Start by ensuring your eyelids are clean and free of any oils. Apply an eyeshadow primer to create a smooth canvas for the eyeliner. This will also help your eyeliner last longer without smudging.
Step 2: Create a Guideline
Using a pencil eyeliner, create a light, angled line extending from the outer corner of your eye towards the end of your eyebrow. This guideline will serve as the base for your wing and ensure symmetry on both sides.
Step 3: Connect the Line
With your chosen eyeliner, start at the inner corner of your eye and draw a thin line along your lash line, gradually thickening as you move towards the outer corner. Connect this line to the guideline you created in Step 2, forming the wing.
Step 4: Fill in the Wing
Carefully fill in the area within the wing, ensuring a smooth and even application. Take your time and use small, controlled strokes for the best results.
In conclusion, following these steps diligently will help you achieve a symmetrical and polished cat eye look. Remember, patience and practice are key, so don’t be discouraged if you don’t get it perfect on the first try. Keep practicing, and you’ll master the art of the cat eye in no time.
Troubleshooting Common Cat Eye Problems
Even with the best techniques, you might encounter some common cat eye problems. Here are some tips to troubleshoot and fix them, ensuring you always achieve a flawless finish.
Uneven Wings
One of the most common issues is creating uneven wings. To fix this, use makeup remover wipes or cotton swabs dipped in makeup remover to clean up the longer or thicker wing. Start over if necessary, always aiming for symmetry.
Smudging
Smudging can ruin your entire look. To prevent smudging, use a waterproof or long-lasting eyeliner. Additionally, setting your eyeliner with a similar-colored eyeshadow can help lock it in place.
Wobbly Lines
Creating a smooth, even line can be challenging. Try using short, controlled strokes instead of one continuous line. This allows for greater precision and reduces the chance of wobbles.
Wing Angle Issues
The angle of your wing can greatly impact the overall look. If your wing is too high or too low, it can make your eyes appear droopy or overly lifted. Adjust the angle to complement your eye shape and create a natural extension of your lower lash line.
In summary, troubleshooting common cat eye problems involves patience, the right tools, and a bit of practice. By addressing issues like uneven wings, smudging, wobbly lines, and wing angle problems, you can achieve a polished and professional-looking cat eye every time. Remember, even makeup artists face challenges, so don’t be discouraged by occasional mishaps.
Adapting the Cat Eye to Different Eye Shapes
The beauty of the cat eye is its versatility. However, to truly perfect the look, it’s essential to adapt the technique to your specific eye shape. Different eye shapes require different approaches to enhance their natural beauty.
Almond Eyes
Almond eyes are the most versatile shape for a cat eye. You can experiment with various styles, from a classic wing to a more dramatic, thicker line. The key is to follow the natural curve of your upper lash line and extend the wing at a slight upward angle.
Round Eyes
For round eyes, the goal is to create the illusion of elongation. Start with a thin line at the inner corner, gradually thickening as you move outwards. Extend the wing horizontally rather than upwards to avoid making your eyes look even rounder.
Hooded Eyes
Hooded eyes can be tricky, as the crease tends to cover part of the eyelid. To create a cat eye that’s visible when your eyes are open, start with a thin line at the inner corner and gradually thicken it. Extend the wing slightly above the hood, ensuring it’s visible when your eyes are open.
Downturned Eyes
For downturned eyes, the key is to lift the eye upwards. Create a thicker wing that starts from the outer corner of your eye and extends upwards, creating a more lifted appearance. Avoid extending the wing downwards, as this can accentuate the downturned shape.
In conclusion, adapting the cat eye to different eye shapes involves understanding your unique features and adjusting the technique accordingly. Whether you have almond, round, hooded, or downturned eyes, there’s a cat eye style that can enhance your natural beauty. Experiment with different techniques and angles to find the perfect fit for your eye shape.
Advanced Tips and Tricks for Cat Eye Perfection
Once you’ve mastered the basic techniques, you can explore some advanced tips and tricks to take your cat eye game to the next level. These techniques can help you achieve even more precise, long-lasting, and versatile results.
Using Tape for a Sharp Wing
For those struggling with symmetry and sharp lines, try using tape as a guide. Apply a small piece of tape at an angle from the outer corner of your eye towards the end of your eyebrow. Use the edge of the tape as a stencil to create a perfect, symmetrical wing.
Creating a Smoked-Out Cat Eye
For a more dramatic and sultry look, try creating a smoked-out cat eye. After applying your eyeliner, use a small, dense brush to smudge the line slightly. Set the smudged line with a similar-colored eyeshadow for a long-lasting, smoky finish.
Experimenting with Colors
Don’t limit yourself to black eyeliner. Experiment with different colors to create unique and eye-catching looks. Brown eyeliner is great for a softer, more natural look, while jewel-toned eyeliners can add a pop of color to your makeup.
Using Eyeshadow as Eyeliner
For a softer, more diffused look, try using eyeshadow as eyeliner. Dip an angled brush into your favorite eyeshadow color and apply it along your lash line, creating a subtle wing. This technique is great for creating a more natural, everyday cat eye.
In summary, advanced tips and tricks can help you elevate your cat eye skills and achieve truly stunning results. From using tape for sharp wings to creating smoked-out effects and experimenting with colors, there are endless possibilities to explore. These techniques will not only enhance your skills but also allow you to express your creativity and find your unique style.
| Key Point | Brief Description |
|---|---|
| 🧰 Essential Tools | Gather the right eyeliner, brushes, and makeup remover. |
| ✍️ Step-by-Step Guide | Prep lids, create a guideline, connect, and fill the wing. |
| 🛠️ Troubleshooting | Fix uneven wings, smudging, and wobbly lines effectively. |
| 👁️ Eye Shapes | Adapt the cat eye style to suit almond, round, hooded, or downturned eyes. |
Frequently Asked Questions
▼
Pencil eyeliner is generally the best option for beginners. It’s more forgiving and easier to control than liquid or gel eyeliners, making it perfect for practicing your technique.
▼
To prevent smudging, use a waterproof or long-lasting eyeliner. You can also set your eyeliner with a similar-colored eyeshadow to help lock it in place throughout the day.
▼
Using tape as a guide is a great way to achieve symmetrical wings. Apply a small piece of tape at an angle from the outer corner of your eye and use it as a stencil.
▼
For hooded eyes, extend the wing slightly above the hood to ensure it’s visible when your eyes are open. Start with a thin line at the inner corner and gradually thicken it as you move outwards.
▼
Yes, you can use eyeshadow as eyeliner for a softer, more diffused look. Dip an angled brush into your favorite eyeshadow color and apply it along your lash line, creating a subtle wing.
Conclusion
Mastering the perfect cat eye takes practice, patience, and the right techniques. By following this guide, experimenting with different styles, and troubleshooting common issues, you’ll be well on your way to achieving a flawless winged eyeliner look that enhances your natural beauty. So, grab your eyeliner and start practicing – your perfect cat eye awaits!


