How to Apply False Eyelashes: Your Pro Tutorial
Learning how to apply false eyelashes can dramatically enhance your look, adding volume and length for stunning eyes; this step-by-step tutorial provides a comprehensive guide to achieving a flawless application every time, ensuring a natural and comfortable fit.
Want to instantly elevate your makeup game? Mastering how to apply false eyelashes like a pro is easier than you think. This tutorial will guide you through each step, ensuring a flawless and glamorous look that lasts all day.
Essential Tools for Perfect False Eyelash Application
Before diving into the application process, gathering the right tools is crucial. Having everything at your fingertips ensures a smooth, efficient, and professional-looking result. Prepare your workstation with these must-have items for applying false eyelashes.
Lash Adhesive
The adhesive is arguably the most important tool. Opt for a high-quality, latex-free glue to avoid irritation and ensure a strong hold. Clear or dark-toned adhesives are available depending on your preference; clear glue blends seamlessly, while dark glue can enhance the eyeliner effect.
Eyelash Applicator Tools
Tweezers or a specialized lash applicator can greatly improve precision. These tools allow you to grip and position the lashes close to your lash line without obstructing your view. Angled tweezers are particularly useful for beginners.
Scissors
Most false eyelashes are too long for the average eye. Small, sharp scissors are essential for trimming the lash band to fit your eye shape. Properly trimmed lashes look more natural and feel more comfortable.
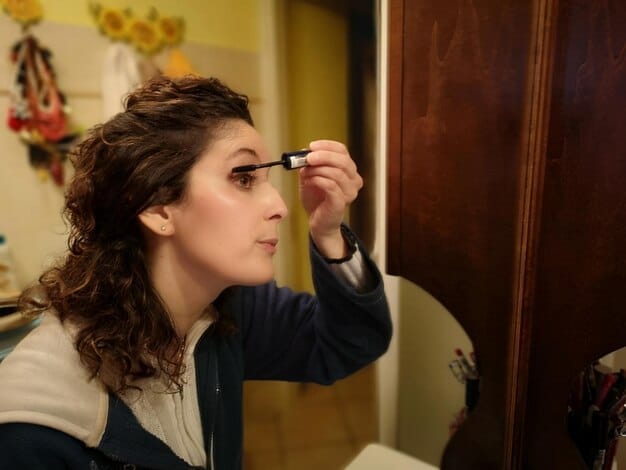
Mascara
Mascara is used both before and after applying the false lashes. A coat of mascara on your natural lashes before application provides a base for the falsies to adhere to, while a coat after blends the natural and false lashes together seamlessly.
Eyeliner
Eyeliner is used to conceal the lash band, creating a smooth and polished look. Whether you prefer liquid, gel, or pencil eyeliner, ensure it matches the color of your lash glue to enhance the seamless effect.
- High-Quality Glue: Choose a latex-free adhesive to prevent irritation and ensure a strong, lasting hold.
- Precision Applicator: Use tweezers or a lash applicator for accurate placement and a comfortable grip.
- Sharp Scissors: Trim the lash band to match your eye shape for a natural and custom fit.
- Reliable Mascara: Apply before and after for cohesion and volume.
By having these tools ready, you’ll streamline the application process and enhance the overall appearance of your false eyelashes. This preparation is key to achieving a professional-looking result every time.
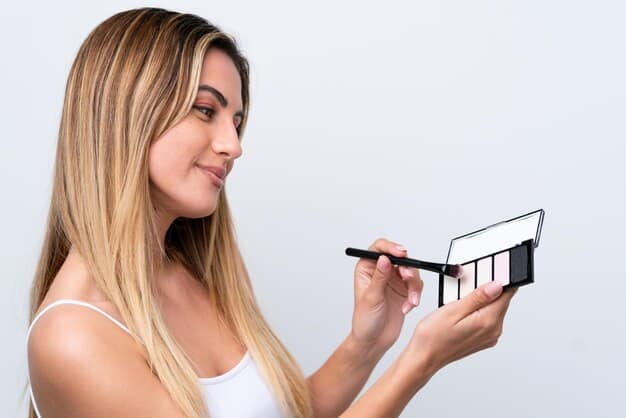
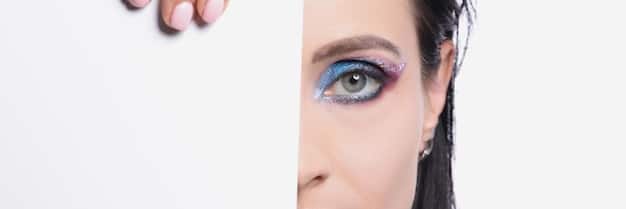
Selecting the Right False Eyelashes for Your Eye Shape
Choosing the right style of false eyelashes can make or break your look. Different eye shapes benefit from different lash styles, so understanding your eye shape is the first step. Consider the occasion and the desired effect, whether it’s subtle enhancement or dramatic flair.
Understanding Eye Shapes
Common eye shapes include almond, round, hooded, and monolid. Almond-shaped eyes can wear almost any lash style, while round eyes benefit from lashes that are longer at the outer corners to create a more elongated appearance. Hooded eyes look great with lashes that are longer in the center to open up the eye, and those with monolid eyes can rock bold, voluminous lashes to add depth.
Choosing the Right Lash Style
Once you know your eye shape, select a lash style that complements it. Natural-looking lashes are great for everyday wear, providing subtle volume and length. Dramatic lashes, with greater length and thickness, are ideal for evenings or special occasions. Wispy lashes offer a softer, more textured look, while flared lashes accentuate the outer corners of the eyes.
Material Matters
False eyelashes come in various materials, including synthetic, mink, and silk. Synthetic lashes are budget-friendly and widely available, but they can sometimes look less natural. Mink lashes are lightweight and offer a luxurious, fluffy appearance, but they are often more expensive. Silk lashes are a great middle ground, providing a natural look and feel at a reasonable price.
- Almond Eyes: Experiment with various styles for a balanced look.
- Round Eyes: Opt for outer-corner emphasis to elongate the eye.
- Hooded Eyes: Choose center-focused lashes to open up the eye.
- Monolid Eyes: Go for bold volume to create depth.
Selecting the right lashes is crucial for achieving your desired effect. Consider your eye shape, the occasion, and the material of the lashes to make the best choice and enhance your natural beauty.
Step-by-Step Guide to Applying False Eyelashes
Applying false eyelashes can seem daunting, but with a little patience and the right technique, you can achieve a professional-looking result. Follow these steps for a flawless application.
Preparation
Start by cleansing your eyelids to remove any oils or makeup. Curl your natural lashes and apply a coat of mascara. This provides a base for the falsies to adhere to and helps blend them seamlessly with your natural lashes. Measure the false eyelashes against your eyelid and trim any excess length from the outer corner.
Applying Adhesive
Hold the lash strip with tweezers or your fingers and apply a thin, even layer of lash adhesive along the entire band. Allow the glue to become tacky for about 30 seconds to a minute. This ensures a stronger hold. If you apply the lashes too soon after applying glue, they will slip and slide. If you wait too long, they won’t bond at all.
Placement and Adjustment
Using tweezers or a lash applicator, position the false eyelashes as close to your natural lash line as possible. Start by placing the center of the lash and then press down the inner and outer corners. Use your fingers or the applicator to gently press the lash band into your lash line. Ensure there are no gaps and the lash band is securely attached.
Final Touches
Once the lashes are in place, use eyeliner to fill in any gaps between the lash band and your natural lash line. This creates a seamless look. Apply another coat of mascara to blend the false and natural lashes together. If desired, use an eyelash curler to further integrate the lashes for a more natural appearance.
- Cleanse and Prep: Ensure your eyelids are clean and your natural lashes are curled and coated with mascara.
- Apply Adhesive Evenly: Use a thin layer of lash glue along the entire lash band and let it dry for 30-60 seconds.
- Position Accurately: Place the lash close to your natural lash line, starting from the center and pressing down the corners.
- Blend and Finish: Use eyeliner to fill gaps and mascara to blend natural and false lashes seamlessly.
Following these steps meticulously will provide a flawless and long-lasting false eyelash application. Practice makes perfect, so don’t be discouraged if it takes a few tries to master the technique.
Tips for a Natural-Looking Finish
Achieving a natural-looking finish with false eyelashes is all about blending and technique. Here are some advanced tips to elevate your application and make your falsies look like they’re your own.
Blending Techniques
To make your false eyelashes look more natural, use a combination of mascara and eyeliner to blend them seamlessly with your natural lashes. Apply mascara after the lashes are in place to bind them together. Use a fine-tipped eyeliner to fill any gaps between the lash band and your lash line, creating a smooth, continuous line.
Subtle Trimming
Even if you’ve trimmed your lashes to fit your eye shape, subtle adjustments can make a big difference. Trim the lashes in small increments to avoid over-trimming. Focus on removing length from the outer corners for a more natural taper. Alternately, you avoid having to trim them at all if you purchase individual lashes as opposed to strip lashes.
Choosing the Right Style for Realism
Opt for lashes that mimic the natural pattern of your lashes. Lashes with varying lengths and thicknesses tend to look more realistic than uniformly dense lashes. Wispy or tapered lashes are also a great choice for a natural look, as they provide volume and length without appearing overly dramatic.
Maintaining and Reusing Lashes
Proper care can extend the life of your false eyelashes and keep them looking natural. After each use, gently remove any glue buildup with tweezers or a cotton swab. Store your lashes in their original case to maintain their shape. Avoid applying mascara directly to the false lashes, as this can make them look clumpy and unnatural.
- Blend Seamlessly: Use mascara and eyeliner to merge false and natural lashes.
- Subtle Trimming: Make small adjustments for a perfect fit.
- Choose Realistic Styles: Opt for lashes with varying lengths and densities.
- Maintain Properly: Clean and store lashes to prolong their use.
By implementing these tips, you can enhance your false eyelash application for a natural-looking and polished finish. The key is to focus on blending, trimming, and selecting the right lash style for your desired effect.
Troubleshooting Common False Eyelash Problems
Even with careful application, common issues can arise when applying false eyelashes. Knowing how to troubleshoot these problems can save you time and frustration.
Lash Band Lifting
One common issue is the lash band lifting at the corners. This often happens if the glue hasn’t become tacky enough or if the lashes haven’t been properly pressed into the lash line, or if you just look around too much while its trying to dry in place. To fix this, apply a small amount of fresh glue to the lifting corner, let it dry for a few seconds, and then press the corner back into place. Ensure the entire band is securely adhered to your lash line.
Glue Visibility
If you can see the lash glue, it could be that you used too much. If the glue is clear it will dry clear. If the glue is darker it will dry similar to eyeliner. Use a damp cotton swab to gently remove any excess glue from the lash line. You can also use a fine-tipped eyeliner to conceal any visible glue and blend it seamlessly with your natural lashes.
Irritation or Allergic Reaction
Some individuals may experience irritation or an allergic reaction to lash glue. If this happens, remove the false eyelashes immediately and discontinue use of the adhesive. Opt for a latex-free glue or try a different brand to minimize irritation. Always perform a patch test before applying new adhesives to your entire lash line.
Uneven Application
If one lash looks different from the other, it may be due to uneven placement or trimming. Carefully remove the lashes and reapply. Pay attention to the placement, ensuring both lashes are positioned at the same angle and as close to your natural lash line as possible. Double-check the length and trim if necessary to ensure they match.
- Lash Band Lifting: Reapply glue to lifting corners and press into place.
- Visible Glue: Remove excess glue with a damp cotton swab or use eyeliner to conceal.
- Irritation: Discontinue use and try a latex-free or different brand of adhesive.
- Uneven Application: Reapply, ensuring symmetrical placement and length.
By addressing these common issues, you can ensure a comfortable, flawless, and long-lasting false eyelash application. Don’t be afraid to make adjustments and experiment until you find the techniques that work best for you.
False Eyelash Aftercare and Removal
Proper aftercare and removal are essential for maintaining the health of your natural lashes and prolonging the life of your false eyelashes. Neglecting these steps can lead to damage and irritation.
Gentle Removal Techniques
Avoid pulling or tugging at your false eyelashes, as this can damage your natural lashes. Instead, use a lash adhesive remover or an oil-based makeup remover to gently dissolve the glue. Apply the remover along the lash line with a cotton swab and wait a few minutes for the adhesive to soften. Gently wiggle the false eyelashes until they detach from your lash line. Do not force your lashes to come off!
Cleaning and Storing Lashes
After removing your false eyelashes, gently clean them to remove any glue or makeup residue. Use tweezers or a small brush to carefully peel off any remaining adhesive. Store your lashes in their original case to maintain their shape and protect them from dust and damage. Proper storage can help them retain their shape.
Caring for Natural Lashes
After removing false eyelashes, it’s important to care for your natural lashes. Apply a lash-conditioning serum or a small amount of castor oil to nourish and strengthen your lashes. Avoid rubbing your eyes excessively, as this can cause breakage. Give your lashes a break from false eyelashes occasionally to allow them to recover.
Recognizing Signs of Damage
Be aware of any signs of damage to your natural lashes, such as thinning, breakage, or irritation. If you notice these issues, discontinue use of false eyelashes and consult with a dermatologist or eye care professional. Early detection and treatment can prevent further damage and promote healthy lash growth.
- Gentle Removal: Use adhesive remover or oil-based makeup remover to dissolve glue.
- Cleaning Lashes: Remove glue and makeup residue with tweezers or a brush.
- Caring for Natural Lashes: Apply lash serum or castor oil and avoid rubbing eyes.
- Recognizing Damage: Watch for thinning, breakage, or irritation and discontinue use if necessary.
By following these aftercare and removal guidelines, you can protect your natural lashes and keep your false eyelashes in great condition for future use.
| Key Point | Brief Description |
|---|---|
| 📌 Essential Tools | High-quality glue, applicators, scissors, mascara, and eyeliner are crucial. |
| 👁️ Eye Shape Matters | Choose lashes that suit your eye shape: almond, round, hooded, or monolid. |
| ✨ Natural Finish Tips | Blend with mascara/liner, trim subtly, and choose realistic styles. |
| ✅ Aftercare | Gently remove lashes, clean, store properly, and care for natural lashes. |
Frequently Asked Questions
▼
To choose the right size, measure the lash strip against your eyelid. Trim any excess length from the outer corner to ensure a comfortable and natural fit. This prevents the lashes from extending too far beyond your natural lash line.
▼
Yes, false eyelashes can be reused if properly cared for. Gently remove any glue buildup after each use. Store them in their original case to maintain their shape and protect them from dust. Avoid applying mascara directly to the lashes.
▼
Opt for a high-quality, latex-free adhesive to avoid irritation. Clear glue blends seamlessly, while dark glue can enhance the eyeliner effect. Ensure the glue is specifically designed for use with false eyelashes.
▼
Use a lash adhesive remover or an oil-based makeup remover to gently dissolve the glue. Apply the remover along the lash line with a cotton swab and wait a few minutes. Gently wiggle the false eyelashes until they detach.
▼
Remove the false eyelashes immediately and discontinue use of the adhesive. Rinse your eyes with cool water and avoid rubbing them. If irritation persists, consult with a dermatologist or eye care professional for further advice.
Conclusion
Mastering how to apply false eyelashes can significantly enhance your beauty routine, adding glamour and confidence to your look. By following this comprehensive guide, selecting the right tools and styles, and practicing diligently, you’ll achieve a flawless and natural-looking application every time. Remember to prioritize aftercare to prolong the life of your lashes and protect your natural ones.


