How to Contour Your Nose: Slimmer Look Guide

Contouring your nose can create the illusion of a slimmer, more defined shape by using strategic highlights and shadows. This step-by-step guide provides the techniques and product recommendations to achieve a professionally contoured nose at home.
Want to refine your nose’s appearance without surgery? How to Contour Your Nose: A Step-by-Step Guide for a Slimmer Look is your go-to resource. Discover the transformative power of makeup and enhance your facial harmony with simple techniques.
Understanding Nose Contouring: The Basics
Nose contouring is a makeup technique used to alter the perceived shape of the nose through the strategic application of light and shadow. It’s all about creating illusions.
By understanding the basic principles, you can tailor the contour to your unique nose shape, achieving a refined and balanced look.
Why Contour Your Nose?
Contouring can help to enhance facial features, balance proportions, and even make the nose appear smaller or straighter. It’s a non-invasive technique to modify your appearance.
It’s also a reversible method, allowing you to experiment without permanent changes.
- Enhances facial symmetry.
- Creates a slimmer nose appearance.
- Adds definition to the face.
- Balances overall facial proportions.
Ultimately, nose contouring allows for personalized cosmetic adjustments that complement individual beauty aesthetics.
Essential Tools and Products for Nose Contouring
Having the right tools and products is crucial for a seamless application and a natural-looking contour. Using quality products can also prevent irritation and provide better results.
Let’s explore the key items you’ll need to achieve the perfect nose contour.
Contour Products
Choose a contour shade that’s two to three shades darker than your natural skin tone. Matte formulas work best to mimic natural shadows, while cream contours offer blendability.
Powder contours are buildable and great for beginners, and you could use a taupe shade contour for a more natural shadow.
Highlight Products
A highlighter should be a shade lighter than your natural skin tone with a subtle shimmer or matte finish. Liquid or powder highlighters add dimension to the bridge of the nose.
The highlight captures light, accentuating the areas you want to bring forward.
Brushes and Applicators
Invest in a small, angled brush for precise contour application and a fluffy blending brush for seamless integration. A small detail brush can be useful for highlighting.
The right brushes make all the difference in achieving a sculpted nose.
Using the right tools and products ensures optimal results, making the contouring process more effective and enjoyable.
Step-by-Step Guide: Contouring for a Slimmer Nose
Now that you’ve got your tools and products ready, let’s dive into the step-by-step process. These instructions will help you contour your nose for a slimmer look.
Follow these steps carefully to achieve a flawless application.
Step 1: Preparation
Start with a clean, moisturized face. Apply your foundation and concealer as usual. This creates a smooth base for your contour.
A well-prepared canvas ensures the contour blends seamlessly.
Step 2: Apply Contour
Using your angled brush, apply the contour shade down the sides of your nose, starting from the inner brow and extending to the tip. Keep the lines thin and even.
This creates the illusion of narrower sides.
Step 3: Blend
Use your fluffy blending brush to soften the contour lines. Blend the product upwards towards the inner brow and outwards towards the sides of your nose. This avoids harsh lines.
Blending is Key for a Natural Look.
- Use gentle circular motions.
- Avoid dragging the product.
- Focus on softening edges.
Blending the contour ensures it looks like a natural shadow, not a stripe of makeup.
Step 4: Apply Highlight
Apply your highlighter down the bridge of your nose, from the top to just above the tip. Start with a small amount and build up as needed.
This highlights the center of your nose, making it appear more defined.
Step 5: Blend Again
Use a clean blending brush or your finger to gently blend the highlight into the contour. This creates a seamless transition between the light and shadow.
Blending the highlight makes the contour appear even more natural.
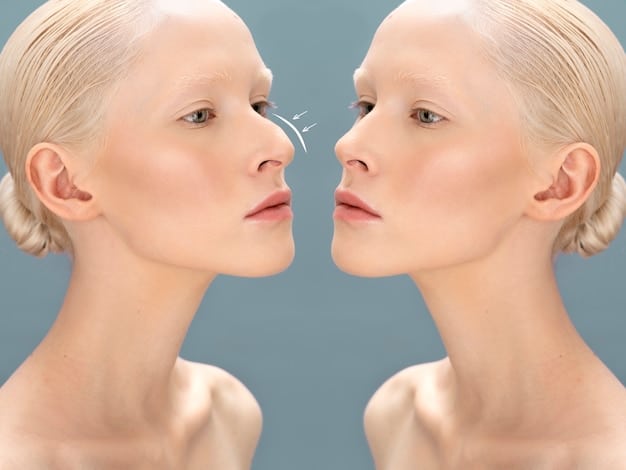
Adapting Contouring to Different Nose Shapes
Every nose is unique, and the contouring technique may need adjustments to suit different shapes. Here are some strategies to adapt your contouring based on nose shape.
Understanding the nuances of your nose shape is crucial for optimal results.
Wide Nose
For a wide nose, apply the contour lines closer to the center to create a narrower appearance. Blend thoroughly to soften any harsh lines.
Contouring closer to the center can dramatically slim the nose.
Long Nose
Apply the contour slightly lower on the sides and avoid highlighting the entire bridge to shorten the nose’s appearance. Focus the highlight on the upper part of the bridge.
Shortening the highlight helps create a more balanced look.
Hooked Nose
Contour the tip of the nose to soften the hook. Apply a small amount of contour under the tip to create a slight lift. Highlight the bridge but avoid the hooked area.
Strategic contour Placement Helps to Straighten.
- Contour the tip to minimize the hook.
- Highlight the bridge.
- Blend Gently.
Adapting the technique ensures that contouring enhances the natural shape of each nose, creating a harmonious facial appearance.
Common Mistakes and How to Avoid Them
Even with the right techniques, it’s easy to make mistakes when contouring your nose. Knowing these common pitfalls helps prevent them.
Being aware of these mistakes can save you time and frustration.
Harsh Lines
Failing to blend properly can result in harsh, unnatural lines. Use a fluffy blending brush and gentle circular motions to soften the edges of the contour.
Proper blending is crucial for a seamless and natural look.
Using the Wrong Shade
Using a contour shade that’s too dark or too warm can make the contour look muddy. Choose a shade that’s two to three shades darker than your skin tone with a cool undertone.
Selecting the right shade ensures a natural, believable shadow.
Over-Highlighting
Applying too much highlight can make the nose look unnaturally bright. Use a light hand and build up the highlight gradually. A subtle shimmer is often more effective.
A subtle highlight enhances without overpowering.
Ignoring Your Nose Shape
Applying the same contouring technique regardless of your nose shape can lead to unflattering results. Adapt your technique to suit your specific nose shape.
Personalization is Key to Flattering Results as it is your face.
Avoiding these common mistakes can dramatically improve the outcome of your nose contouring, leading to a more polished and natural look.
Advanced Nose Contouring Techniques
Once you’ve mastered the basics, you can explore advanced techniques to refine your nose contour even further. These techniques add depth and dimension.
Advanced contouring takes your makeup skills to the next level.
Using Multiple Shades
Experiment with using two slightly different contour shades to create more depth. Apply the deeper shade closer to the sides of the nose and the lighter shade to blend outwards.
This creates a more dimensional effect.
Cream and Powder Combination
Layering cream and powder contours can enhance the longevity and intensity of your contour. Apply cream contour first, set with translucent powder, and then add powder contour for extra definition.
Layering creates a long-lasting, impactful effect.
Focusing on the Tip
For a more refined tip, contour the very end of the nose with a small, precise brush. This creates the illusion of a smaller, more lifted tip.
Refined Tip Enhances the Overall.
- Use precision techniques.
- Apply sparingly.
- Blend carefully.
Mastering advanced techniques allows you to achieve a contour that not only slims but also adds intricate detailing for a flawless finish.
| Key Point | Brief Description |
|---|---|
| ✨ Product Selection | Choose matte contour and subtle highlighter shades for a natural look. |
| 🖌️ Application Technique | Apply contour to the sides and highlighter to the bridge, blending well. |
| 👃 Shape Adaptation | Adjust contour placement to suit wide, long, or hooked nose shapes. |
| 🚫 Avoiding Mistakes | Blend well, use suitable shades, and tailor to your unique nose shape. |
Frequently Asked Questions
▼
Nose contouring is a makeup technique that uses light and shadow to reshape or enhance the appearance of the nose, creating the illusion of a slimmer or more defined nose.
▼
You’ll need a contour product (powder or cream), a highlighter, and appropriate makeup brushes, such as an angled brush for application and a fluffy brush for blending
▼
Select a contour shade that is two to three shades darker than your natural skin tone, with a cool undertone to mimic natural shadows effectively.
▼
For a wide nose, apply contour lines closer to the center of the nose to create a slimmer appearance, and blend thoroughly to soften any harsh lines.
▼
To avoid harsh lines, use a fluffy blending brush and employ gentle, circular motions while blending. This will soften the edges of the contour for a natural gradient.
Conclusion
Mastering the art of nose contouring can significantly enhance your facial features, providing a slimmer and more defined appearance. With the right tools, techniques, and a bit of practice, you can achieve a professionally sculpted nose without invasive procedures. Experiment with different methods to find what works best for your unique nose shape and skin tone, and embrace the transformative power of makeup!

")


