Master the Smoky Eye: 10 Easy Steps for Beginners
How to Create a Stunning Smoky Eye in 10 Easy Steps (Beginner-Friendly Tutorial) involves selecting the right eyeshadows, blending techniques, and tools to achieve a professional-looking smoky eye, even if you’re a beginner in makeup application.
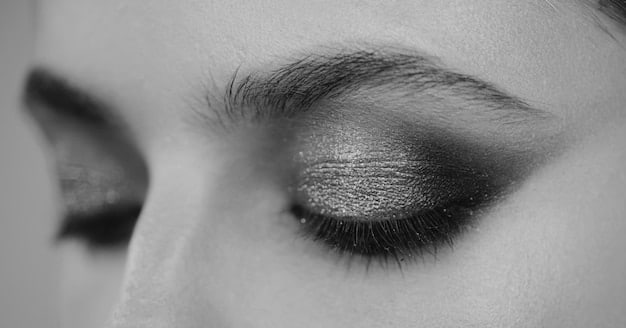
Ready to achieve that sultry, smoky eye look you’ve always admired? This beginner-friendly tutorial, how to create a stunning smoky eye in 10 easy steps, will break down the process, ensuring flawless blending and a mesmerizing finish. Let’s dive in and unleash your inner makeup artist!
Gather Your Essential Tools and Products
Before diving into the application, it’s crucial to gather all the necessary tools and products. Having everything at your fingertips will make the process smoother and more efficient. This includes eyeshadows, brushes, and other essential makeup items.
Eyeshadow Palette
Choose an eyeshadow palette with a range of neutral shades. Matte browns, grays, and blacks are ideal for creating a classic smoky eye. A palette with shimmer shades can add dimension and highlight to your look.
Brushes
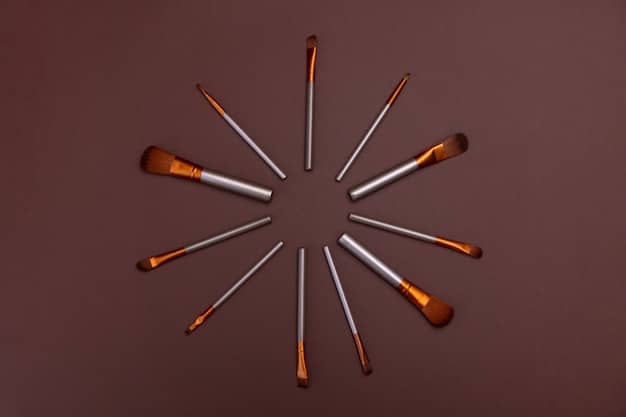
Invest in good quality brushes. A blending brush, a flat shader brush, and a pencil brush are essential for a smoky eye. The blending brush ensures smooth transitions between colors, while the flat shader brush applies the shadow to the lid, and the pencil brush precisely defines the crease and lower lash line.
- Blending Brush: Soft, fluffy bristles to seamlessly blend eyeshadows.
- Flat Shader Brush: Dense bristles for applying shadow to the eyelid.
- Pencil Brush: Small, pointed brush for precise application.
- Optional: An angled brush for defining your eyebrows.
Having the right tools ensures that each step, from initial application to final blending, can be executed with precision, leading to a polished and professional finish.
Prep Your Eyelids for Long-Lasting Wear
Prepping your eyelids helps create a smooth canvas for eyeshadow application and ensures that your smoky eye lasts all day or night. Using an eyeshadow primer is the key to preventing creasing and fading.
Apply Eyeshadow Primer
Apply a thin layer of eyeshadow primer to your eyelids. This will create a tacky base that grips the eyeshadow, preventing it from creasing and fading. A primer also helps to intensify the color of your eyeshadows.
Set with a Base Shade
After applying the primer, set it with a light, neutral eyeshadow. This will create a smooth, even base for blending your other eyeshadows. A matte beige or cream shade works well for this purpose.
Proper preparation sets the stage for a successful smoky eye, ensuring the colors blend seamlessly and the overall look remains vibrant and crease-free for hours.
Step 1: Apply a Medium Base Shade
Begin by applying a medium-toned eyeshadow all over your lid, from your lash line to just above your crease. This shade will act as a base for the darker shades and help create a smooth transition.
Choose the Right Shade
Select a medium brown or taupe shade that complements your skin tone. Use a flat shader brush to pat the eyeshadow onto your eyelid, ensuring even coverage. Gently blend the edges to avoid harsh lines.
Blending is Key
Use a blending brush to soften the edges of the base shade. Blend the eyeshadow upwards and outwards, creating a seamless transition between the base shade and your natural skin tone. This will help create a gradient effect.
This base layer is essential for building depth and dimension, making the subsequent steps more effective and cohesive.
Step 2: Deepen the Crease with a Darker Shade
Adding depth to the crease is what gives the smoky eye its signature sultry look. Using a darker shade in the crease creates dimension and enhances the shape of your eyes.
Select a Darker Shade
Choose a darker shade of eyeshadow, such as a deep brown or charcoal gray. Use a pencil brush to apply the eyeshadow to your crease, focusing on the outer corner of your eye. Blend the color inwards, following the natural curve of your crease.
Blend, Blend, Blend
Use a clean blending brush to soften the edges of the darker shade. Blend the eyeshadow upwards and outwards, creating a seamless transition between the crease color and the base shade. Avoid creating harsh lines or muddy colors.
By focusing the darker shade in the crease and blending it well, you add significant depth and dimension to your eye makeup, enhancing the overall smoky effect.
Step 3: Apply the Darkest Shade to the Outer Corner
To intensify the smoky effect, apply the darkest shade of eyeshadow to the outer corner of your eye. This will create depth and dimension, making your eyes appear more captivating.
Concentrate the Color
Choose the darkest shade of eyeshadow, such as a matte black or deep charcoal gray. Use a small, flat shader brush to pat the eyeshadow onto the outer corner of your eye. Concentrate the color in the outer V shape of your eye.
Blend Outwards and Upwards
Use a blending brush to soften the edges of the darkest shade. Blend the eyeshadow outwards and upwards, connecting it with the crease color. Ensure that there are no harsh lines or patches of color.
- Outer V: Focus the darkest shade on the outer corner of your eye.
- Small Brush: Use a small, flat shader brush for precise application.
- Gradual Blending: Blend the eyeshadow gradually to avoid harsh lines.
- Connecting Shades: Connect the outer corner color with the crease color seamlessly.
Concentrating the darkest shade on the outer corner of the eye and blending it carefully creates a sultry, captivating effect, intensifying the smoky allure.
Step 4: Highlight the Inner Corner and Brow Bone
Highlighting the inner corner and brow bone adds light and dimension to your eyes, making them appear brighter and more open. This step balances the dark shades, creating a more polished look.
Apply a Light Shade
Choose a light, shimmery eyeshadow, such as a champagne or pearly white. Use a small brush to apply the eyeshadow to the inner corner of your eye. This will brighten up your eyes and make them appear more awake.
Highlight the Brow Bone
Apply a matte, light-colored eyeshadow to your brow bone. This will highlight the shape of your eyebrows and add dimension to your eyes. Blend the eyeshadow downwards, creating a smooth transition between the brow bone and the rest of your eye makeup.
Highlighting the inner corner and brow bone not only adds brightness and dimension but also frames the eyes beautifully, enhancing the overall smoky effect.
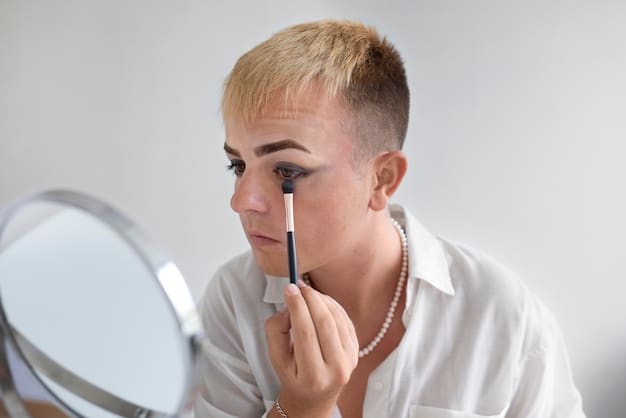
Step 5: Line Your Upper and Lower Lash Lines
Lining your upper and lower lash lines enhances the definition of your eyes and adds intensity to the smoky eye look. The choice of eyeliner and the technique used can significantly impact the final result.
Choose Your Eyeliner
Select an eyeliner that complements your eyeshadow colors. Black eyeliner is a classic choice for a smoky eye, but you can also use brown or gray eyeliner for a softer look. Use a pencil eyeliner or gel eyeliner for the upper lash line and a pencil eyeliner for the lower lash line.
Lining Techniques
Line your upper lash line, starting from the inner corner of your eye and working your way outwards. Create a thin line that gradually thickens towards the outer corner of your eye. Smudge the eyeliner with a pencil brush to create a softer, more diffused line. Line your lower lash line, starting from the outer corner of your eye and working your way inwards. Smudge the eyeliner with a pencil brush to create a smoky effect.
Proper lining not only defines the eyes but also ties the entire smoky eye look together, adding a touch of drama and sophistication.
Steps 6-10: Complete the Look and add Finishing Touches
The final steps involve adding mascara, cleaning up any fallout, and setting your makeup for a long-lasting finish. These finishing touches are crucial for completing the smoky eye look.
Clean Up and Blend
Use a cotton swab dipped in makeup remover to clean up any fallout under your eyes. Blend any harsh lines with a clean blending brush to create a seamless, airbrushed finish.
Apply Your Mascara
Apply several coats of mascara to your upper and lower lashes. This will add volume and length to your lashes, making your eyes appear more open and defined. Use an eyelash curler before applying mascara for extra lift.
- Clean Up: Use a cotton swab and makeup remover to remove any fallout.
- Mascara Coats: Apply several coats for volume and length.
- Eyelash Curler: Curl your lashes before applying mascara for lift.
- Setting Spray: Use a setting spray to keep your makeup in place all day or night.
Completing your smoky eye with these finishing touches ensures a polished, long-lasting look that enhances your natural beauty.
| Key Steps | Brief Description |
|---|---|
| 🎨 Apply Base Shade | Apply a medium shade all over the lid, blending upwards. |
| ⚫ Deepen Crease | Add a darker shade to the crease for depth, blending well. |
| ✨ Highlight Inner Corner | Highlight the inner corner to brighten the eyes. |
| 👁️ Apply Mascara | Finish with mascara to define and lengthen lashes. |
Frequently Asked Questions
▼
Neutral shades like browns, grays, and blacks are ideal for a classic smoky eye. You can also incorporate shimmer shades for added dimension.
▼
A blending brush, a flat shader brush, and a pencil brush are essential for creating a smoky eye. These brushes help with application and blending.
▼
Use an eyeshadow primer to create a smooth base that grips the eyeshadow, preventing it from creasing. Setting the primer with a light shade also helps.
▼
Properly prepping your eyelids with primer and setting spray after application will ensure your smoky eye lasts all day or night without fading.
▼
Yes, you can use other colors like brown, burgundy, or even deep blues and greens for a smoky eye. Just ensure they blend well for the gradient effect.
Conclusion
Creating a smoky eye doesn’t have to be intimidating. By following these ten easy steps, you can achieve a stunning, sultry look that enhances your natural beauty and adds drama to any occasion. So, grab your brushes, choose your shades, and unleash your inner makeup artist!


