Smoky Eye Tutorial: 10 Easy Steps for Beginners
How to Create a Stunning Smoky Eye in 10 Easy Steps (Beginner-Friendly Tutorial) offers a simple, step-by-step guide perfect for makeup novices to achieve a professional-looking smoky eye, enhancing their overall makeup skills and confidence.
Dreaming of a dramatic, smoky eye but don’t know where to start? This guide, How to Create a Stunning Smoky Eye in 10 Easy Steps (Beginner-Friendly Tutorial), breaks down the process into manageable steps, even if you’ve never picked up an eyeshadow brush before. Let’s get started!
The Essential Tools for a Perfect Smoky Eye
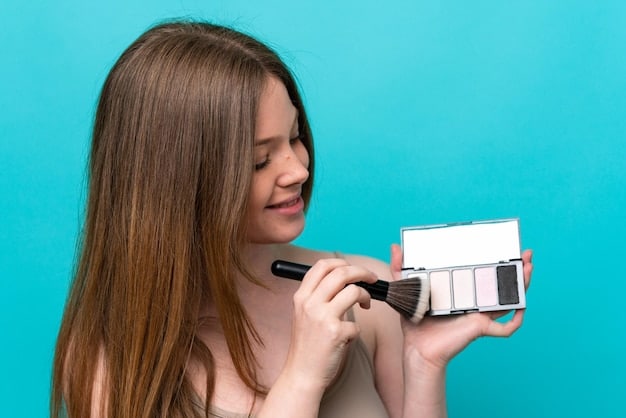
Before diving into the steps, let’s gather the necessary tools. Having the right brushes and products will make the application smoother and the final result more professional. Don’t worry, you don’t need a huge collection; just a few key essentials will do the trick.
Must-Have Eyeshadow Brushes
Investing in a few good quality eyeshadow brushes is crucial. Here are the brushes you’ll need:
- Blending Brush: A fluffy, rounded brush for seamless blending.
- Crease Brush: A tapered brush to define the crease.
- Flat Shader Brush: For packing color onto the lid.
- Small Detail Brush: For precise application and smudging.
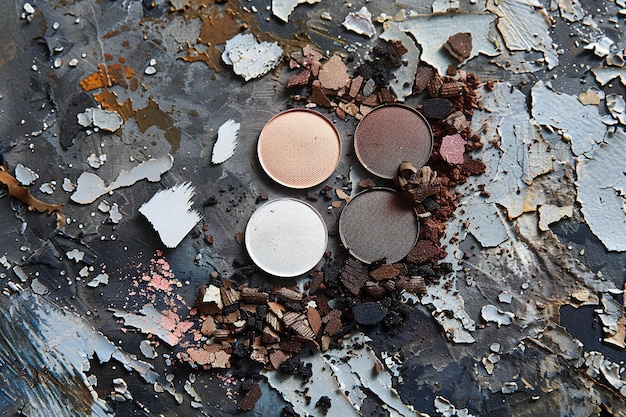
Key Eyeshadow Shades
For a classic smoky eye, you’ll need a range of eyeshadow shades. Consider these options:
- Light Base Shade: A neutral color close to your skin tone.
- Medium Transition Shade: A matte shade a few shades darker than your skin tone.
- Dark Smoky Shade: A dark brown, gray, or black for depth.
- Highlight Shade: A light shimmer or matte shade for the brow bone.
With the right tools and shades, you’re already halfway to achieving a stunning smoky eye. Next, we’ll explore the step-by-step application process.
Step 1: Prime Your Eyelids
Priming your eyelids is essential for creating a smooth canvas and ensuring your eyeshadow stays in place all day (or night!). Primer prevents creasing and enhances the color payoff of your eyeshadows.
Why Use an Eyelid Primer?
Eyelid primer offers several benefits for your eyeshadow application:
- Prevents Creasing: It creates a barrier that stops oils from breaking down your eyeshadow.
- Enhances Color Payoff: It provides a sticky base for eyeshadows to adhere to, making the colors more vibrant.
- Extends Wear Time: It helps your eyeshadow last longer without fading or smudging.
How to Apply Eyelid Primer
Applying eyelid primer is quick and easy. Follow these steps:
- Apply a small amount of primer to your fingertip.
- Gently pat the primer all over your eyelid, from the lash line to the brow bone.
- Wait a few seconds for the primer to dry before applying eyeshadow.
Priming your eyelids sets the stage for a flawless smoky eye application. Now, let’s move on to applying the base eyeshadow.
Step 2: Apply a Light Base Eyeshadow
Once your eyelids are primed, it’s time to apply a light base eyeshadow. This step creates a smooth, even surface for blending and prevents harsh lines.
Choosing the Right Base Shade
Select a light, neutral shade that is close to your skin tone. Matte shades work best, as they provide a clean canvas for the rest of your eyeshadows.
Application Technique
Use a flat shader brush to apply the base eyeshadow all over your eyelid, from the lash line to the brow bone. Make sure to blend it seamlessly into your skin.
Applying a light base eyeshadow is a simple step that makes a big difference in the final look. Next, we’ll add dimension to your eyes by applying a medium transition shade.
Step 3: Define the Crease with a Transition Shade
Adding a transition shade to your crease is crucial for creating depth and dimension. This step helps to blend the dark smoky shade seamlessly into the lighter shades.
Selecting the Perfect Transition Shade
Choose a matte shade that is a few shades darker than your skin tone. Warm browns, taupes, and mauves work well for most skin tones.
How to Apply the Transition Shade
Use a crease brush to apply the transition shade to your crease. Start at the outer corner of your eye and blend inwards, following the natural shape of your eye socket. Blend well to avoid harsh lines.
- Apply in windshield wiper motions
- Use a light hand for blending
- Build up the color gradually
Defining the crease with a transition shade adds depth and dimension to your eyes, preparing them for the main smoky shade. Now, let’s move on to Step 4.
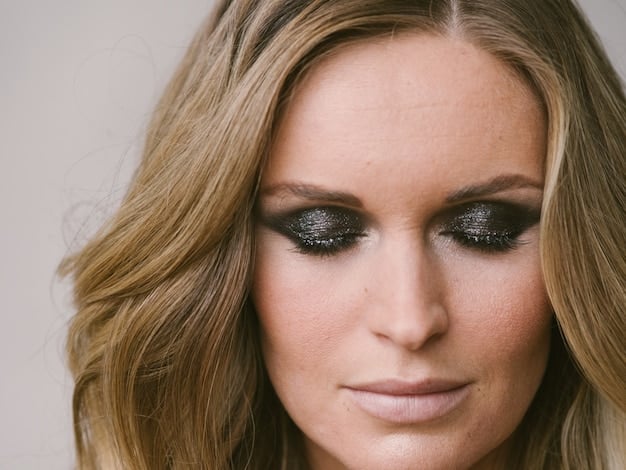
Step 4: Apply the Dark Smoky Shade to the Lid
This is where the magic happens! Applying the dark smoky shade to your lid is what creates that signature smoky eye effect. Choose a dark brown, gray, or black shade, depending on your desired intensity.
Choosing Your Smoky Shade
Consider your skin tone and eye color when selecting your smoky shade:
- Fair Skin: Opt for dark browns or grays instead of black, which can look too harsh.
- Medium Skin: Dark browns, grays, and deep plums work well.
- Dark Skin: You can pull off black, dark browns, and jewel-toned shades.
Application Tips
Use a flat shader brush to pat the dark smoky shade onto your eyelid, focusing on the outer corner and blending inwards towards the center of your lid. Leave the inner corner of your eye bare for now.
- Pat the eyeshadow instead of swiping to maximize color payoff.
- Start with a small amount of eyeshadow and build up the color gradually.
- Blend, blend, blend!
Applying the dark smoky shade to your lid is the key to creating a dramatic smoky eye. Now, let’s move on to blending the edges for a seamless finish.
Step 5: Blend, Blend, Blend!
Blending is the most important step in creating a stunning smoky eye. It softens the edges of the dark smoky shade and creates a seamless transition between the different eyeshadows.
Tools for Blending
Use a clean blending brush to blend the edges of the dark smoky shade into the transition shade. Use windshield wiper motions to soften the lines.
Blending Techniques
Focus on the crease and the outer corner of your eye, where the dark smoky shade meets the transition shade. Blend until there are no harsh lines.
Blending is the key to achieving a professional-looking smoky eye. Take your time and blend thoroughly for a seamless finish. Now, let’s move on to highlighting the brow bone.
Step 6: Highlight the Brow Bone
Highlighting the brow bone adds dimension and lift to your eyes. It also helps to blend the eyeshadows seamlessly into your skin.
Choosing the Right Highlight Shade
Select a light shimmer or matte shade that is lighter than your skin tone. Champagne, ivory, and soft gold shades work well for most skin tones.
Application Technique
Use a small brush to apply the highlight shade to your brow bone, just below your eyebrow. Blend it seamlessly into the transition shade.
Highlighting the brow bone adds dimension and lift to your eyes, completing the eyeshadow application. Next, we’ll line the upper and lower lash lines.
Step 7: Line Your Upper and Lower Lash Lines
Lining your upper and lower lash lines adds definition and intensity to your eyes. You can use eyeliner, eyeshadow, or a pencil liner for this step.
Choosing Your Liner
Consider these options:
- Eyeliner: Provides a precise, defined line.
- Eyeshadow: Creates a softer, smudged line.
- Pencil Liner: Easy to use and blend.
Lining Techniques
Line your upper lash line as close to the lashes as possible. You can create a thin, subtle line or a thicker, more dramatic line, depending on your preference. Line your lower lash line with the same shade, connecting it to the upper lash line at the outer corner of your eye. Smudge the lower lash line for a softer, smokier effect.
Lining your upper and lower lash lines adds definition and intensity to your eyes, enhancing the smoky effect. Now, let’s move on to Step 8.
Step 8: Smudge the Liner for a Smoky Effect
Smudging the liner is what truly transforms your lined eyes into a smoky masterpiece. This step softens the edges and blends the liner into the eyeshadow for a seamless finish.
Tools for Smudging
Use a small detail brush or a cotton swab to gently smudge the liner along your upper and lower lash lines. Focus on the edges and avoid smudging the liner too much.
Smudging Techniques
Use short, back-and-forth motions to smudge the liner into the eyeshadow. Blend the liner until there are no harsh lines.
Smudging the liner creates that signature smoky effect, softening the edges and blending everything together seamlessly. Now, let’s add mascara to complete the look.
Step 9: Apply Mascara to Upper and Lower Lashes
Mascara is the finishing touch that completes your smoky eye look. It adds volume, length, and definition to your lashes, making your eyes look bigger and brighter.
Choosing Your Mascara
Consider these options:
- Volumizing Mascara: Adds thickness to your lashes.
- Lengthening Mascara: Adds length to your lashes.
- Curling Mascara: Curls your lashes upwards.
Application Techniques
Apply one or two coats of mascara to your upper and lower lashes. Wiggle the wand at the base of your lashes to add volume and definition. Avoid clumping by wiping off excess mascara from the wand before applying.
Applying mascara adds the final touch to your smoky eye look, completing the transformation. Now, we’ll do our final touchup in step 10.
Step 10: Final Touches and Clean Up
Now that you’ve completed all the steps, it’s time to do some final touch-ups and clean up any mistakes. This step ensures that your smoky eye looks polished and professional.
Cleaning Up Mistakes
Use a cotton swab dipped in makeup remover to clean up any eyeshadow fallout or smudges around your eyes. Be gentle and avoid rubbing too hard.
Final Touches
Check your blending and make sure there are no harsh lines. Add more eyeshadow or liner if needed, and blend everything seamlessly.
After completing all the steps and adding the final touches, your stunning smoky eye is complete. Remember to practice and experiment to find the techniques and shades that work best for you.
| Key Step | Brief Description |
|---|---|
| 🎨 Prime Eyelids | Apply primer for smooth, long-lasting eyeshadow. |
| ⚫ Apply Smoky Shade | Pat dark shade onto the lid for the smoky effect. |
| 🧹 Blend Everything | Blend edges until there are no harsh lines. |
| ✨ Add Mascara | Finish by applying mascara to upper and lower lashes. |
Frequently Asked Questions
▼
Classic smoky eyes use blacks, grays, and browns. For a modern twist, try deep blues, greens, or purples. Consider your skin tone and eye color when choosing shades.
▼
Tap off excess eyeshadow from your brush before applying. Use a damp brush for more pigment and less fallout. Apply your eyeshadow before your foundation to easily clean up any fallout.
▼
Use a fluffy blending brush and light, windshield-wiper motions. Focus on the edges and blend until there are no harsh lines. Take your time and build up the color gradually.
▼
Start with an eyeshadow primer to create a smooth base and prevent creasing. Set your eyeshadow with a setting spray to lock in the color and prevent fading.
▼
Yes, you can! Choose a medium-toned eyeshadow and apply it to your lid, crease, and lower lash line. Blend well to create a gradient effect. Add mascara to finish the look.
Conclusion
Creating a stunning smoky eye doesn’t have to be intimidating. By following these 10 easy steps and practicing your blending techniques, you’ll be rocking a flawless smoky eye in no time. Experiment with different shades and techniques to find what works best for you, and don’t be afraid to have fun! Happy blending!


