Smoky Eyes for Beginners: Your Step-by-Step Evening Look Guide
Smoky eyes offer a timeless, captivating evening look; this guide provides beginners with a simple, step-by-step approach to achieving this classic style, covering everything from essential tools to blending techniques for a flawless finish.
Ready to master the art of the Smoky Eyes for Beginners: A Step-by-Step Guide to Creating a Classic Evening Look? This guide breaks down the process, making it easy for anyone to achieve a sultry, eye-catching look.
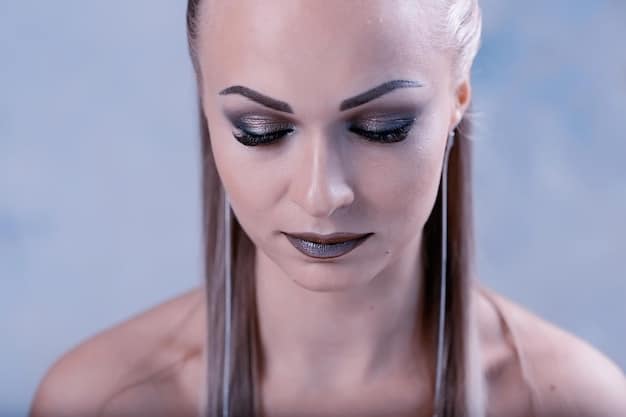
The Allure of Smoky Eyes: Why It’s a Timeless Look
Smoky eyes have been a staple in makeup artistry for decades, gracing red carpets and runways alike. Their enduring appeal lies in their ability to enhance eye shape, add depth, and create a mesmerizing gaze. But what makes this look so universally flattering?
The beauty of the smoky eye is its versatility. It can be adapted to suit any eye color, shape, and skin tone. With the right techniques and products, anyone can achieve a stunning smoky eye that complements their features.
Understanding the Basics
Before diving into the step-by-step process, let’s cover some fundamental aspects of creating a successful smoky eye:
- Color Selection: While black is the classic choice, don’t be afraid to experiment with other shades like browns, purples, greens, or blues. Choose colors that complement your eye color and skin tone.
- Blending is Key: The hallmark of a great smoky eye is seamless blending. Harsh lines are a major no-no. Invest in good blending brushes and practice your technique.
- Building Intensity: Start with a lighter color and gradually build up the intensity with darker shades. This approach allows for greater control and prevents the look from becoming too overwhelming.
Ultimately, the allure of smoky eyes comes from their transformative power. They can instantly elevate any look, making them perfect for evenings out or special occasions. The classic smoky eye is a makeup skill worth mastering. Its techniques lend themselves to a variety of other make-up styles!
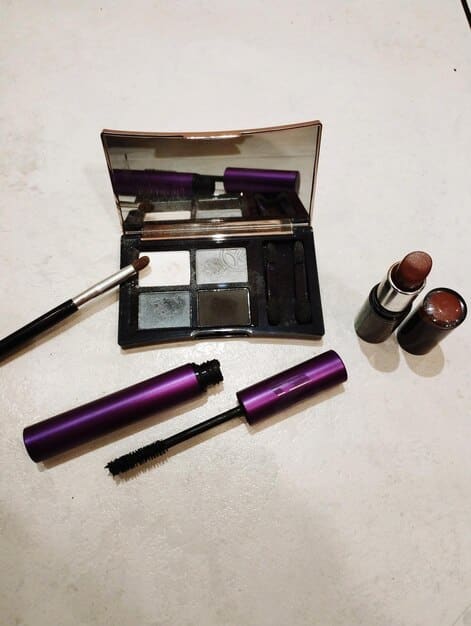
Essential Tools and Products for a Flawless Smoky Eye
Creating a stunning smoky eye requires more than just eyeshadow. Having the right tools and products is crucial for achieving a professional-looking result. Let’s break down the essentials.
Investing in quality makeup brushes can make a world of difference in your application. They allow for smoother blending and more precise placement of color. Don’t skimp on this essential!
Must-Have Brushes
Here are the key brushes you’ll need:
- Blending Brush: A fluffy, tapered brush for seamlessly blending eyeshadows together.
- Crease Brush: A smaller, more precise brush for applying color to the crease of your eye.
- Flat Shader Brush: For packing color onto the lid.
- Smudge Brush: A dense, short-bristled brush for smudging eyeliner and eyeshadow along the lash line.
Essential Products
Beyond brushes, these products are key.
- Eyeshadow Primer: Creates a smooth base, prevents creasing, and enhances color payoff.
- Eyeshadow Palette: Choose a palette with a range of neutral and dark shades in matte and shimmer finishes.
- Eyeliner Pencil or Gel: For defining the lash line and adding intensity. Black or dark brown are classic choices.
- Mascara: Adds volume and length to lashes, completing the look.
- Concealer: To clean up any fallout and brighten the under-eye area.
Having the right tools and products is a fundamental step in mastering the art of the smoky eye. With these essentials, you’ll be well on your way to achieving a flawless and captivating look.
Step-by-Step Guide: Creating Your Smoky Eye
Now that you’ve gathered your tools and products, it’s time to dive into the heart of the smoky eye: the application process. This step-by-step guide will walk you through each stage, ensuring a smooth and successful application.
Remember, practice makes perfect. Don’t be discouraged if your first attempt isn’t flawless. With each try, you’ll refine your technique and achieve better results.
Step 1: Prime Your Lids
Apply a thin layer of eyeshadow primer to your eyelids. This creates a smooth base, prevents creasing, and helps your eyeshadow last longer.
Step 2: Apply a Base Color
Using a flat shader brush, apply a medium-toned eyeshadow (e.g., a warm brown or taupe) all over your lid, from lash line to crease.
Step 3: Define the Crease
Using a crease brush, apply a darker eyeshadow (e.g., a dark brown or black) to the crease of your eye. Blend well to create a soft transition.
Step 4: Apply the Darkest Shade
Using the same crease brush or a smaller, more precise brush, apply the darkest eyeshadow (e.g., black) to the outer corner of your eye, creating a V shape. Blend well to soften the edges. Use windshield wiper motions to blend away harsh lines.
Step 5: Smudge Eyeliner
Line your upper and lower lash lines with eyeliner pencil or gel. Using a smudge brush, gently smudge the eyeliner to create a soft, smoky effect.
Step 6: Blend, Blend, Blend!
This is the most important step. Use a clean blending brush to blend all the colors together, ensuring there are no harsh lines. The goal is a seamless gradient of color.
Step 7: Add Mascara
Apply several coats of mascara to your upper and lower lashes. This will add volume and length, completing the look.
By following these steps, even beginners can turn themselves into seasoned make-up artists. It takes time, patience, and passion for makeup!
Choosing the Right Colors for Your Eye Color
While the classic smoky eye often features black and gray shades, experimenting with different colors can enhance your eye color and create a more personalized look. Here’s a guide to choosing the right colors for your eye color.
Understanding which colors best complement your eyes can elevate your entire look. It’s all about finding the shades that make your eyes pop and bring out their natural beauty.
For Blue Eyes
Warm shades like browns, golds, and coppers can make blue eyes appear brighter and more vibrant. Purple and mauve shades also work well.
For Green Eyes
Purple, plum, and bronze shades enhance the natural green of the eyes. Earthy tones like moss green and khaki can also be flattering.
For Brown Eyes
Brown eyes are incredibly versatile and can pull off a wide range of colors. Gold, bronze, and copper shades enhance the warmth of brown eyes. Blue and green shades can also create a striking contrast.
For Hazel Eyes
Hazel eyes contain a mix of colors, so you can experiment with different shades to bring out specific tones. Gold and bronze shades enhance the warmth, while purple shades bring out the green.
The secret for those with darker skin is to find a contrast, as blending into the shadows on your skin will only cause you to fade into the background. If you have lighter skin, the color is less of a concern, and you can often rely on pastels and more traditionally cool and light colors to make you stand out.
Adapting the Smoky Eye for Different Occasions
The smoky eye is often associated with evening events, but it can be adapted for daytime wear or more casual occasions. The key is to adjust the intensity and color palette to suit the setting.
A heavy, dark smoky eye might not be appropriate for a brunch date, but a lighter, more subtle version can be perfect for adding a touch of glamour to your everyday look.
Daytime Smoky Eye
For a daytime smoky eye, opt for lighter, more natural shades like browns, taupes, and bronzes. Use a lighter hand when applying color and focus on blending well.
- Use a light brown or taupe eyeshadow as your base color.
- Apply a slightly darker brown to the crease, blending well.
- Line your upper lash line with brown eyeliner and smudge it gently.
- Apply one or two coats of mascara.
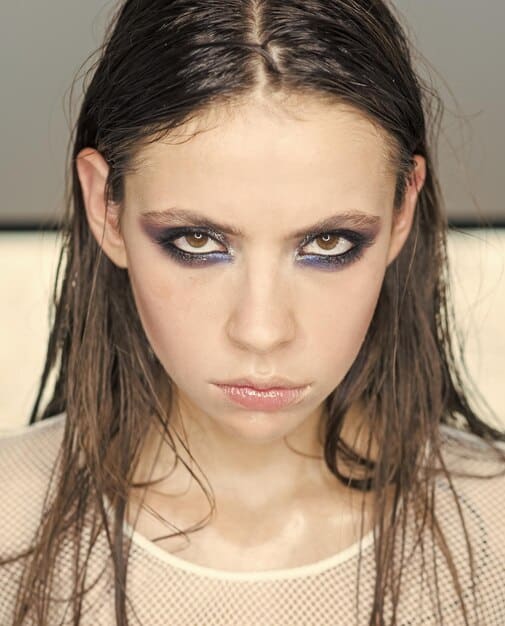
Evening Smoky Eye
For an evening smoky eye, you can use darker shades and build up the intensity. Black, gray, and charcoal are classic choices, but you can also experiment with jewel-toned eyeshadows.
- Use a dark gray or black eyeshadow as your base color.
- Apply a black eyeshadow to the crease, blending well.
- Line your upper and lower lash lines with black eyeliner and smudge it.
- Apply several coats of mascara.
Casual Smoky Eye
For a more casual smoky eye, try using a single eyeshadow shade. Apply a medium-toned eyeshadow to your lid and blend it out towards the crease. Line your upper lash line with eyeliner and smudge it gently. Finish with mascara.
Ultimately, the smoky eye makeup style is a versatile way to enhance your look in everyday activities, making you stand out in a sophisticated fashion. There is also the opportunity to match the colors of your smoky eye to your clothes to make your outfit even more aesthetically pleasing.
Common Mistakes to Avoid When Creating Smoky Eyes
Creating a flawless smoky eye takes practice, and it’s easy to make mistakes along the way. Here are some common pitfalls to avoid.
By being aware of these common mistakes, you can learn from others’ experiences and avoid making the same errors yourself.
Harsh Lines
The hallmark of a great smoky eye is seamless blending. Harsh lines can make the look appear dated and unprofessional. Always blend well to create a soft transition between colors.
Too Much Eyeshadow
Applying too much eyeshadow can make the look appear heavy and overwhelming. Start with a small amount of product and build up the intensity gradually.
Ignoring the Brows
Well-groomed brows are essential for framing the face and completing the smoky eye look. Fill in any sparse areas with a brow pencil or powder and define the shape with brow gel.
Forgetting to Prime
Eyeshadow primer is a must for creating a smooth base, preventing creasing, and enhancing color payoff. Don’t skip this step!
Not Cleaning Up Fallout
Eyeshadow fallout is inevitable, especially when working with dark shades. Use a makeup wipe or cotton swab to clean up any fallout before moving on to your foundation. Set your undereye area with powder before doing your eye makeup to avoid staining.
By avoiding these common mistakes, you’ll be well on your way to mastering the art of the smoky eye and creating a flawless, captivating look. A little bit of practice goes a long way, especially if you seek out tutorials from seasoned veterans.
| Key Point | Brief Description |
|---|---|
| 🎨 Color Choice | Select colors that complement your eye color for a striking look. |
| 🖌️ Blending | Blend eyeshadows seamlessly to avoid harsh lines and create a gradient. |
| ✨ Occasion | Adapt the intensity and colors of your smoky eye for daytime or evening events. |
| 🛠️ Tools | Use proper brushes like blending, crease, and smudge brushes for perfect makeup. |
FAQ
▼
Use a fluffy blending brush and windshield-wiper motions to blend the eyeshadows seamlessly. Start with a light hand and gradually build up the intensity. Ensure there are no harsh lines or visible edges for a well-blended effect.
▼
Yes, absolutely! Experiment with browns, purples, greens, and blues to create a customized smoky eye look. Choose colors that complement your eye color and skin tone. Shades of bronze and burgundy can also provide a softer, warmer smoky effect.
▼
Always start with an eyeshadow primer to create a smooth base, which will prevent creasing and help your eyeshadow last longer. Set your eyeshadow with a translucent powder for added staying power. Avoid applying too much product at once.
▼
A pencil or gel eyeliner works well for a smoky eye because they are easy to smudge. Apply the eyeliner along your lash line and gently smudge it with a brush to create a soft, diffused effect. A kohl pencil is also a great option for its creamy texture.
▼
Use waterproof or long-lasting formulas for your eyeliner and mascara to help prevent smudging. Set your under-eye area with a powder to avoid transfer. You can also use a setting spray to lock in your entire makeup look for extended wear.
Conclusion
Mastering the smoky eye is a rewarding journey that combines technique, creativity, and a bit of practice. With this guide, you’re well-equipped to create a classic evening look that enhances your natural beauty and leaves a lasting impression. So, gather your tools, embrace the steps, and get ready to unveil your captivating smoky eyes to the world.


