The Ultimate Guide to Color Correcting: Achieve Flawless Skin in 2025

The Ultimate Guide to Color Correcting in 2025 provides expert techniques and essential knowledge to achieve flawless skin by neutralizing imperfections and enhancing your natural beauty, catering to all skin tones and concerns.
Unlock the secret to flawless skin with The Ultimate Guide to Color Correcting: Achieve Flawless Skin in 2025. This comprehensive guide will walk you through the process of neutralizing imperfections and enhancing your natural beauty, ensuring a radiant complexion.
Understanding Color Correcting
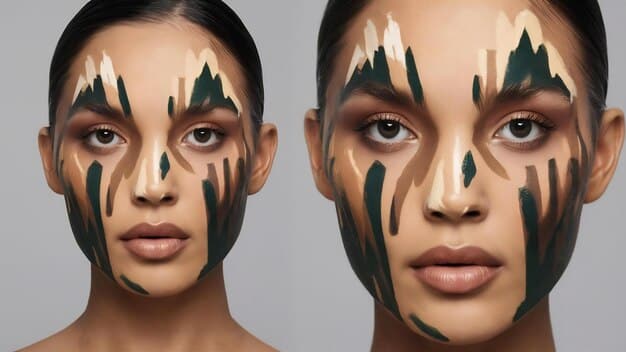
Color correcting is a makeup technique used to neutralize unwanted tones on the skin. By applying specific colors, you can cancel out imperfections like redness, dark circles, and hyperpigmentation, creating an even base for foundation.
It’s all about using the color wheel to your advantage. Colors that are opposite each other on the wheel neutralize each other. For instance, green cancels out red, and orange cancels out blue.
The Color Wheel and Its Uses
The color wheel is your best friend when it comes to color correcting. Understanding which colors cancel each other out is crucial for achieving the desired effect.
Common Skin Concerns and Corresponding Colors
Various skin concerns can be addressed with color correcting. From redness to dullness, there’s a color to neutralize the issue.
- Redness: Green correctors are perfect for neutralizing redness caused by rosacea, acne, or sunburn.
- Dark Circles: Peach or orange correctors work wonders on dark circles under the eyes, especially for darker skin tones.
- Dullness: Purple or lavender correctors can brighten up dull complexions and add a healthy glow.
- Hyperpigmentation: Yellow correctors help to even out skin tone and reduce the appearance of dark spots.

In essence, understanding the color wheel and how each color interacts with your skin’s imperfections is the first step to mastering color correcting. It’s a tailored approach to achieving an even and flawless base.
Choosing the Right Color Corrector for Your Skin Tone
Selecting the appropriate color corrector depends heavily on your skin tone. What works for fair skin might not be as effective for deeper complexions.
Assess your skin carefully and consider the severity of your concerns when choosing the right shade.
Fair Skin
For fair skin, use light peach or yellow correctors to address dark circles. Light green works best to neutralize redness without looking ashy.
Medium Skin
Medium skin tones can benefit from orange or salmon correctors to counteract dark circles. Green correctors should be used sparingly to target specific areas of redness.
Dark Skin
Dark skin tones often require deep orange or red correctors to effectively neutralize dark circles. Green correctors should be chosen carefully to avoid making the skin look grey.
It’s essential to test the color corrector in natural light to ensure it blends seamlessly and achieves the desired effect. Patch testing can also help determine if the product suits your skin without causing irritation.
Application Techniques: A Step-by-Step Guide
Applying color correctors correctly can make or break your entire makeup look. Using the right techniques ensures seamless blending and effective neutralization of imperfections.
Begin with a clean, moisturized face to provide a smooth canvas for the product.
Prepping Your Skin
Start by cleansing and moisturizing your skin. Applying a primer can also help to create a smooth surface and ensure the color corrector adheres well.
Applying Color Corrector
Use a small brush or your fingertip to apply the color corrector only to the areas that need correction. Avoid applying it all over the face.
- Dab, Don’t Smear: Gently dab the color corrector onto the targeted area to avoid disturbing the product underneath.
- Use a Light Hand: Apply a thin layer of color corrector, building it up as needed. Too much product can look cakey.
- Blend Seamlessly: Use a damp makeup sponge or brush to blend the edges of the color corrector into the surrounding skin.
The key is to apply the color corrector only where needed and blend it seamlessly into the skin. Practice makes perfect, so don’t be afraid to experiment.
Layering Foundation and Concealer
After color correcting, the next step is layering foundation and concealer. This process helps to create a flawless, even complexion.
Choose products that complement your skin type and concern. The goal is to achieve a natural, seamless finish.
Choosing the Right Foundation
Select a foundation that matches your skin tone and undertone. Apply it in thin layers, building up coverage as needed.
Applying Foundation
Use a damp makeup sponge or brush to apply the foundation over the color-corrected areas. Gently press the product into the skin to avoid disturbing the color corrector.
Concealer Application
Apply concealer to any remaining imperfections or areas that need extra coverage. Choose a concealer that is one shade lighter than your skin tone to brighten the undereye area.
Layering foundation and concealer correctly is essential for achieving a smooth, flawless finish. Remember to blend well and use a light hand to avoid a cakey appearance.
Setting Your Makeup for Longevity
Setting your makeup is crucial for ensuring it lasts throughout the day. Using the right products and techniques can prevent creasing, fading, and oiliness.
A well-set makeup look not only lasts longer but also looks more polished.
Choosing the Right Setting Powder
Select a setting powder that matches your skin type. Loose powders are great for oily skin, while pressed powders are better for dry skin.
Setting Powder Techniques
Use a large, fluffy brush to apply the setting powder all over your face. Focus on areas that tend to get oily, such as the T-zone.
- Baking: For extra longevity, apply a generous amount of setting powder to the undereye area and let it sit for 5-10 minutes before dusting it off.
- Setting Spray: Finish with a setting spray to lock everything in place and create a natural, dewy finish.
Setting your makeup is the final step in achieving a flawless complexion. By using the right products and techniques, you can ensure your makeup looks fresh and lasts all day.
Common Mistakes to Avoid
Color correcting can be tricky, and it’s easy to make mistakes. Avoiding these common pitfalls can save you from makeup mishaps.
Being mindful of these mistakes can help you improve your color-correcting technique.
Using Too Much Product
Applying too much color corrector can make your makeup look cakey and unnatural. Start with a small amount and build up coverage as needed.
Not Blending Properly
Failing to blend the color corrector seamlessly into the skin can result in harsh lines and uneven texture. Always use a damp makeup sponge or brush to blend the edges.
Choosing the Wrong Shade
Using the wrong shade of color corrector can exacerbate the problem instead of neutralizing it. Make sure to choose the right color for your skin tone and concern.
By avoiding these common mistakes, you can improve your color-correcting skills and achieve a flawless, natural-looking complexion. Remember, practice makes perfect, so don’t be discouraged if you don’t get it right the first time.
| Key Point | Brief Description |
|---|---|
| 🎨 Understanding Color Theory | Learn how the color wheel helps neutralize skin imperfections. |
| 👩⚕️ Choosing the Right Corrector | Select correctors based on your skin tone and specific concerns like redness or dark circles. |
| 🖌️ Application Techniques | Apply correctors sparingly and blend well for a natural look. |
| ✅ Setting for Longevity | Use setting powder and spray to keep your makeup flawless all day. |
Frequently Asked Questions
▼
Color correcting is a makeup technique that uses colors opposite each other on the color wheel to neutralize unwanted tones on the skin, creating a more even complexion before applying foundation.
▼
Consider your skin tone and the specific concern you want to address. Green neutralizes redness, peach/orange corrects dark circles, and lavender brightens dullness. Test in natural light for best results.
▼
Yes, if you prefer a lighter coverage look. Apply the color corrector to the targeted areas and blend well. You can set it with a light dusting of translucent powder to keep it in place.
▼
Use a damp makeup sponge or a small, dense brush to gently dab and blend the color corrector into your skin. Avoid rubbing, as this can disturb the product underneath.
▼
Apply the color corrector sparingly and build up coverage as needed. Ensure your skin is well-moisturized and use a damp sponge to blend the product seamlessly into your skin.
Conclusion
Mastering color correcting in 2025 is within your reach with the right knowledge and techniques. By understanding the color wheel, choosing the right shades for your skin tone, and practicing seamless blending, you can achieve a flawless complexion that enhances your natural beauty. Embrace the art of color correcting and elevate your makeup game to new heights.


