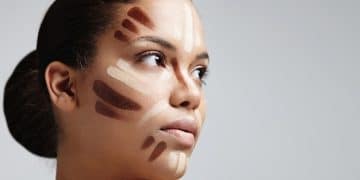
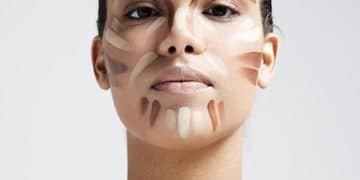
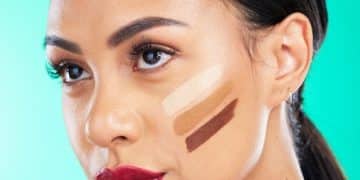
The Ultimate Guide to Highlighting: Get a Lit-From-Within Glow

Highlighting is a makeup technique used to enhance and brighten certain areas of the face, creating a radiant, “lit-from-within” glow, and this guide will provide you with the knowledge to master this beauty skill.
Want to achieve that coveted lit-from-within glow? This The Ultimate Guide to Highlighting: Achieve a Lit-From-Within Glow will break down everything you need to know, from choosing the right products to mastering application techniques.
Understanding the Basics of Highlighting
Highlighting is more than just applying shimmer; it’s about strategically using light to sculpt and define your features. By understanding the fundamentals, you can achieve a flawless, radiant complexion.
Let’s delve into the core principles that make highlighting such an effective makeup technique.
What is Highlighting?
Highlighting is a makeup technique that uses light-reflecting products to accentuate specific areas of the face. It works by bringing these areas forward, creating dimension and a more sculpted appearance.
Why Highlight?
Highlighting can enhance your natural features, add a youthful glow, and create a more polished makeup look. It can also help to balance your face shape and draw attention to your best assets.
- Enhances natural features
- Adds a youthful glow
- Creates dimension and definition
- Balances face shape
Ultimately, mastering the basics of highlighting unlocks a powerful tool to enhance your beauty and achieve a radiant complexion.

Choosing the Right Highlighter for Your Skin
Selecting the right highlighter is crucial for achieving a natural, flattering glow. Factors like skin tone, skin type, and desired intensity all play a role in finding the perfect match.
Let’s explore the different types of highlighters and how to choose the best one for you.
Highlighter Formulas: Powder, Cream, Liquid
Highlighters come in various formulas, each offering a different finish and application style. Powder highlighters are great for oily skin, cream highlighters work well on dry skin, and liquid highlighters are suitable for all skin types.
Finding the Right Shade for Your Skin Tone
Choosing the right shade is essential for a natural-looking highlight. Fair skin tones look best with champagne or pearlescent shades, medium skin tones can rock gold or rose gold, and deep skin tones shine with bronze or copper highlighters.
- Consider your skin tone when selecting a highlighter shade.
- Pay attention to your skin type to choose the right formulation.
- Experiment with different intensities to find your preferred level of glow.
By considering these elements and experimenting with different options, you can find the perfect highlighter(s) to enhance your unique skin tone and achieve that coveted lit-from-within radiance.
Essential Tools for Perfect Highlighting
Having the correct tools can make all the difference in highlighting success. The right brushes and sponges will help you achieve a seamless, diffused application for a natural-looking glow.
Here’s a rundown of the must-have tools for highlighting, along with tips on how to use them effectively.
Brush Types for Highlighting
For powder highlighters, a fan brush or tapered brush is ideal. For cream or liquid highlighters, a damp beauty sponge or a synthetic brush works best.
Sponges and Applicators
Beauty sponges are excellent for blending cream and liquid highlighters seamlessly into the skin. They provide a diffused, natural finish that’s perfect for everyday wear.
- Invest in high-quality brushes for precise application.
- Use a light hand to avoid over-application.
- Clean your brushes regularly to prevent bacteria buildup.
Equipping yourself with the right tools and mastering proper techniques will elevate your highlighting game and unlock a radiant, sculpted complexion.
Step-by-Step Highlighting Application Guide
Knowing where to apply highlighter is just as important as choosing the right product. Strategic placement can enhance your features and create a flattering, sculpted look.
Follow this step-by-step guide to master the art of highlighting and unlock a radiant, three-dimensional complexion.
Prep Your Skin
Start with a clean, moisturized face to ensure a smooth canvas for your makeup. Apply your foundation, concealer, and any other base products before highlighting.
Highlight Placement: Cheekbones, Brow Bone, Cupid’s Bow
The most common areas to highlight are the cheekbones, brow bone, and Cupid’s bow. These areas naturally catch the light and will enhance your features.
Blending Techniques for a Seamless Finish
Blend, blend, blend! Use a light hand and circular motions to blend the highlighter seamlessly into your skin. Avoid harsh lines or obvious shimmer.
Mastering the art of placement and blending is key to achieving a natural, radiant highlight that enhances your best features.
Highlighting for Different Skin Tones and Types
Highlighting isn’t a one-size-fits-all technique. Different skin tones and types require slightly different approaches to achieve the most flattering result.
Let’s explore how to customize your highlighting routine based on your unique complexion and skin type.
Highlighting for Fair Skin
Fair skin tones look best with light, pearlescent highlighters that won’t appear too stark. Avoid overly glittery or dark shades.
Highlighting for Medium Skin
Medium skin tones can pull off a wider range of highlighter shades, including gold, rose gold, and champagne. Experiment to find your perfect match.
Highlighting for Deep Skin
Deep skin tones look stunning with rich, warm-toned highlighters like bronze, copper, or gold. These shades will create a beautiful, radiant glow.
Tailoring your highlighting technique to your unique skin tone and type will help you achieve a flawless, radiant complexion that enhances your natural beauty.
Common Highlighting Mistakes and How to Avoid Them
Highlighting can be tricky. Overdoing it, choosing the wrong shade, or applying it incorrectly can lead to a less-than-desirable result.
Here are some common highlighting mistakes and how to avoid them, ensuring a flawless, radiant glow every time.
Over-Highlighting
Applying too much highlighter can make your skin look greasy or unnatural. Start with a light hand and build up the intensity as needed.
Using the Wrong Shade
Choosing a highlighter that’s too light or too dark for your skin tone can create a harsh, unflattering effect. Opt for a shade that complements your complexion.
Not Blending Properly
Failing to blend your highlighter seamlessly into your skin can result in obvious lines or patches of shimmer. Take the time to blend thoroughly for a natural-looking finish.
- Start with a small amount of product and build up intensity gradually.
- Choose a highlighter shade that complements your skin tone.
- Blend, blend, blend for a seamless, natural-looking finish.
By avoiding these common errors, you’ll be well on your way to mastering the art of highlighting and achieving a flawless, radiant glow.
Advanced Highlighting Techniques
Once you’ve mastered the basics of highlighting, you can experiment with more advanced techniques to enhance your features and create a custom glow.
Here are some advanced highlighting techniques to take your makeup game to the next level.
Strobing vs. Traditional Highlighting
Strobing is a technique that focuses solely on highlighting, without using contour. It creates a super dewy, radiant look.
Layering Highlighters for a Multi-Dimensional Glow
Layering different highlighter formulas and shades can create a stunning, multi-dimensional glow. Start with a cream highlighter and top with a powder for added intensity.
Highlighting Beyond the Face
Don’t limit your highlighting to just your face! You can also highlight your collarbones, shoulders, and even your legs for an all-over radiant glow.
Experimenting with these advanced techniques will help you customize your highlighting routine and achieve a truly unique, show-stopping glow that highlights your natural beauty.
| Key Point | Brief Description |
|---|---|
| ✨ Choose the Right Shade | Select a highlighter shade that complements your skin tone for a natural glow. |
| 🖌️ Use the Right Tools | Apply highlighter with a fan brush or beauty sponge for seamless blending. |
| 📍 Strategic Placement | Apply highlighter on cheekbones, brow bone, and cupid’s bow to enhance features. |
| 🚫 Avoid Over-Highlighting | Start with a light hand and build up the intensity to avoid a greasy look. |
Frequently Asked Questions
Highlighting enhances specific facial areas with light-reflecting products, creating dimension and a sculpted appearance. It draws attention to features and adds a radiant glow.
The best spots include the cheekbones, brow bone, cupid’s bow, and inner corners of the eyes. These areas naturally catch light, enhancing your features effectively.
Yes, highlighting is suitable for all skin types. The key is to choose the right formula; powder for oily skin, cream for dry skin, and liquid for all skin types.
For fair skin, use champagne or pearlescent shades. Medium skin tones can rock gold or rose gold. Deeper skin tones shine with bronze and copper highlighters.
Highlighting uses both contour and light, while strobing focuses solely on highlighting to create a dewy, radiant look by maximizing light reflection on the face.
Conclusion
Mastering the art of highlighting can transform your makeup look, adding dimension, radiance, and a touch of glamour. By understanding the basics, choosing the right products, and practicing your application techniques, you can achieve a flawless, lit-from-within glow that enhances your natural beauty.

